|
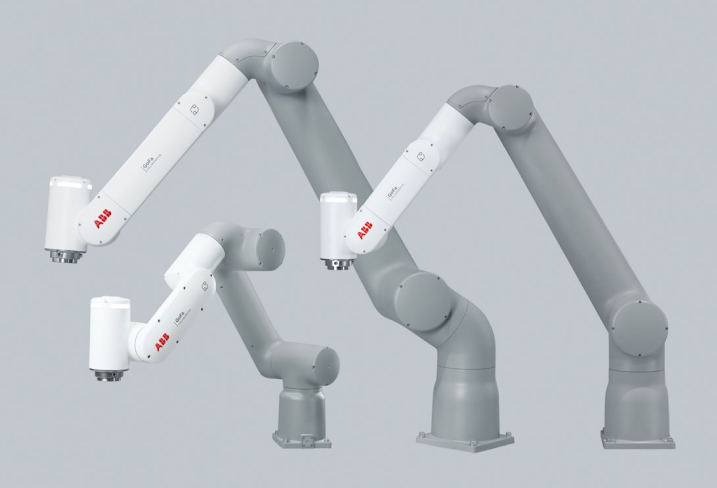
ABB - Robot Configuration for MachineLogic Applications
Overview
This document provides step-by-step instructions for configuring and using an ABB GoFa robot with MachineLogic. This integration ensures seamless operation within Vention’s motion components ecosystem. Robots purchased through the Vention platform are pre-configured for a simple and efficient setup experience.
Supported Models
The following ABB robot models are supported when used with the Omnicore C30 controller, which is required for compatibility with Vention’s MachineLogic:
GoFa 5
GoFa 10
GoFa 12
Installation Steps
The robot and it’s controller are shipped from factory pre-configured to ensure ease of deployment. Therefore, only a few steps are required in order to be up an running with your MachineLogic application. To continue with the next steps, ensure all the components you received with your order are out of their shipping boxes. Once this is completed, proceed to the next section.
System Connection
To program the robot through MachineLogic, the MachineMotion must be connected to the Omnicore C30 controller and the necessary safety ecosystem. This guide will define the necessary steps for a basic safety configuration.
Necessary Components
MachineMotion v2 (1 Drive or 4 Drives)
Vention Pendant
E-Stop Module with reset
ABB GoFa Robot (5, 10 or 12)
ABB Omnicore C30 Controller
Robot Safety Module
ABB external switch module
ABB safety harness
Connection Diagram
Bellow is a diagram to demonstrate how to connect each component for a successful installation.
Note
This diagram represent a basic safety configuration and could change if more safety components are needed in the safety chain.
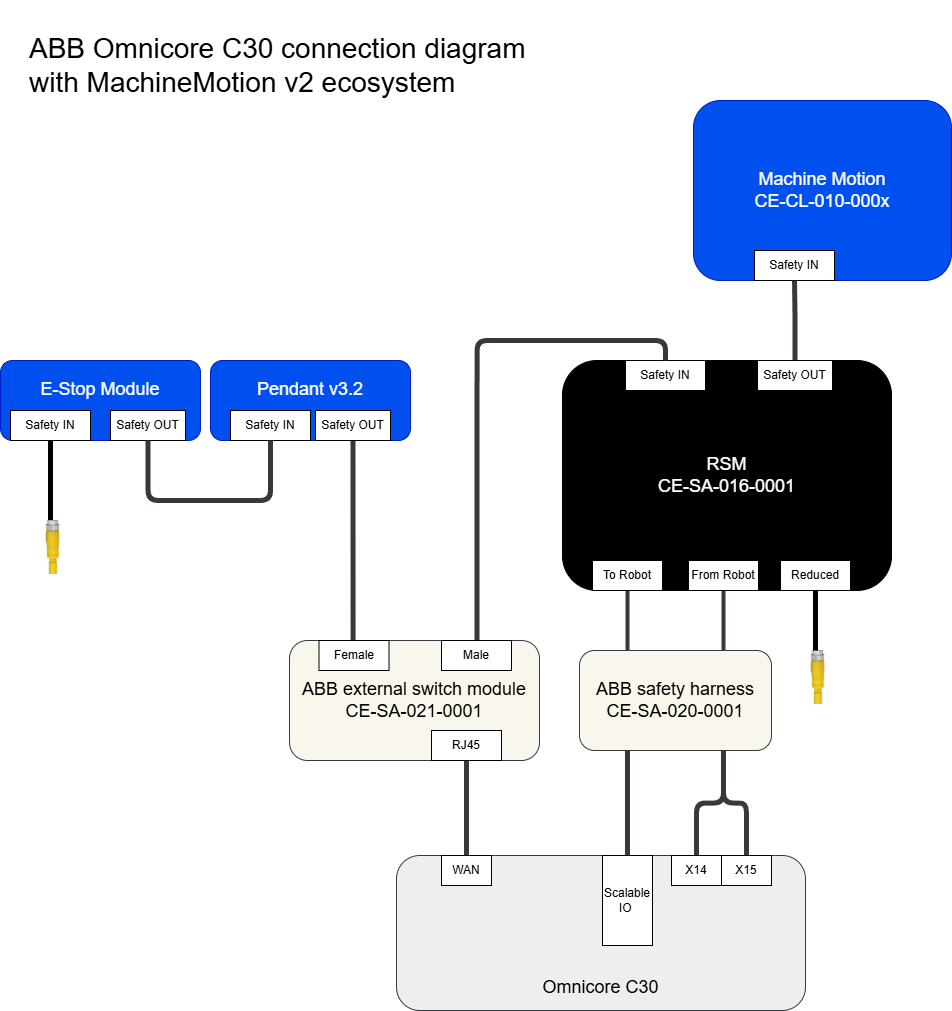 ABB Connection Diagram |
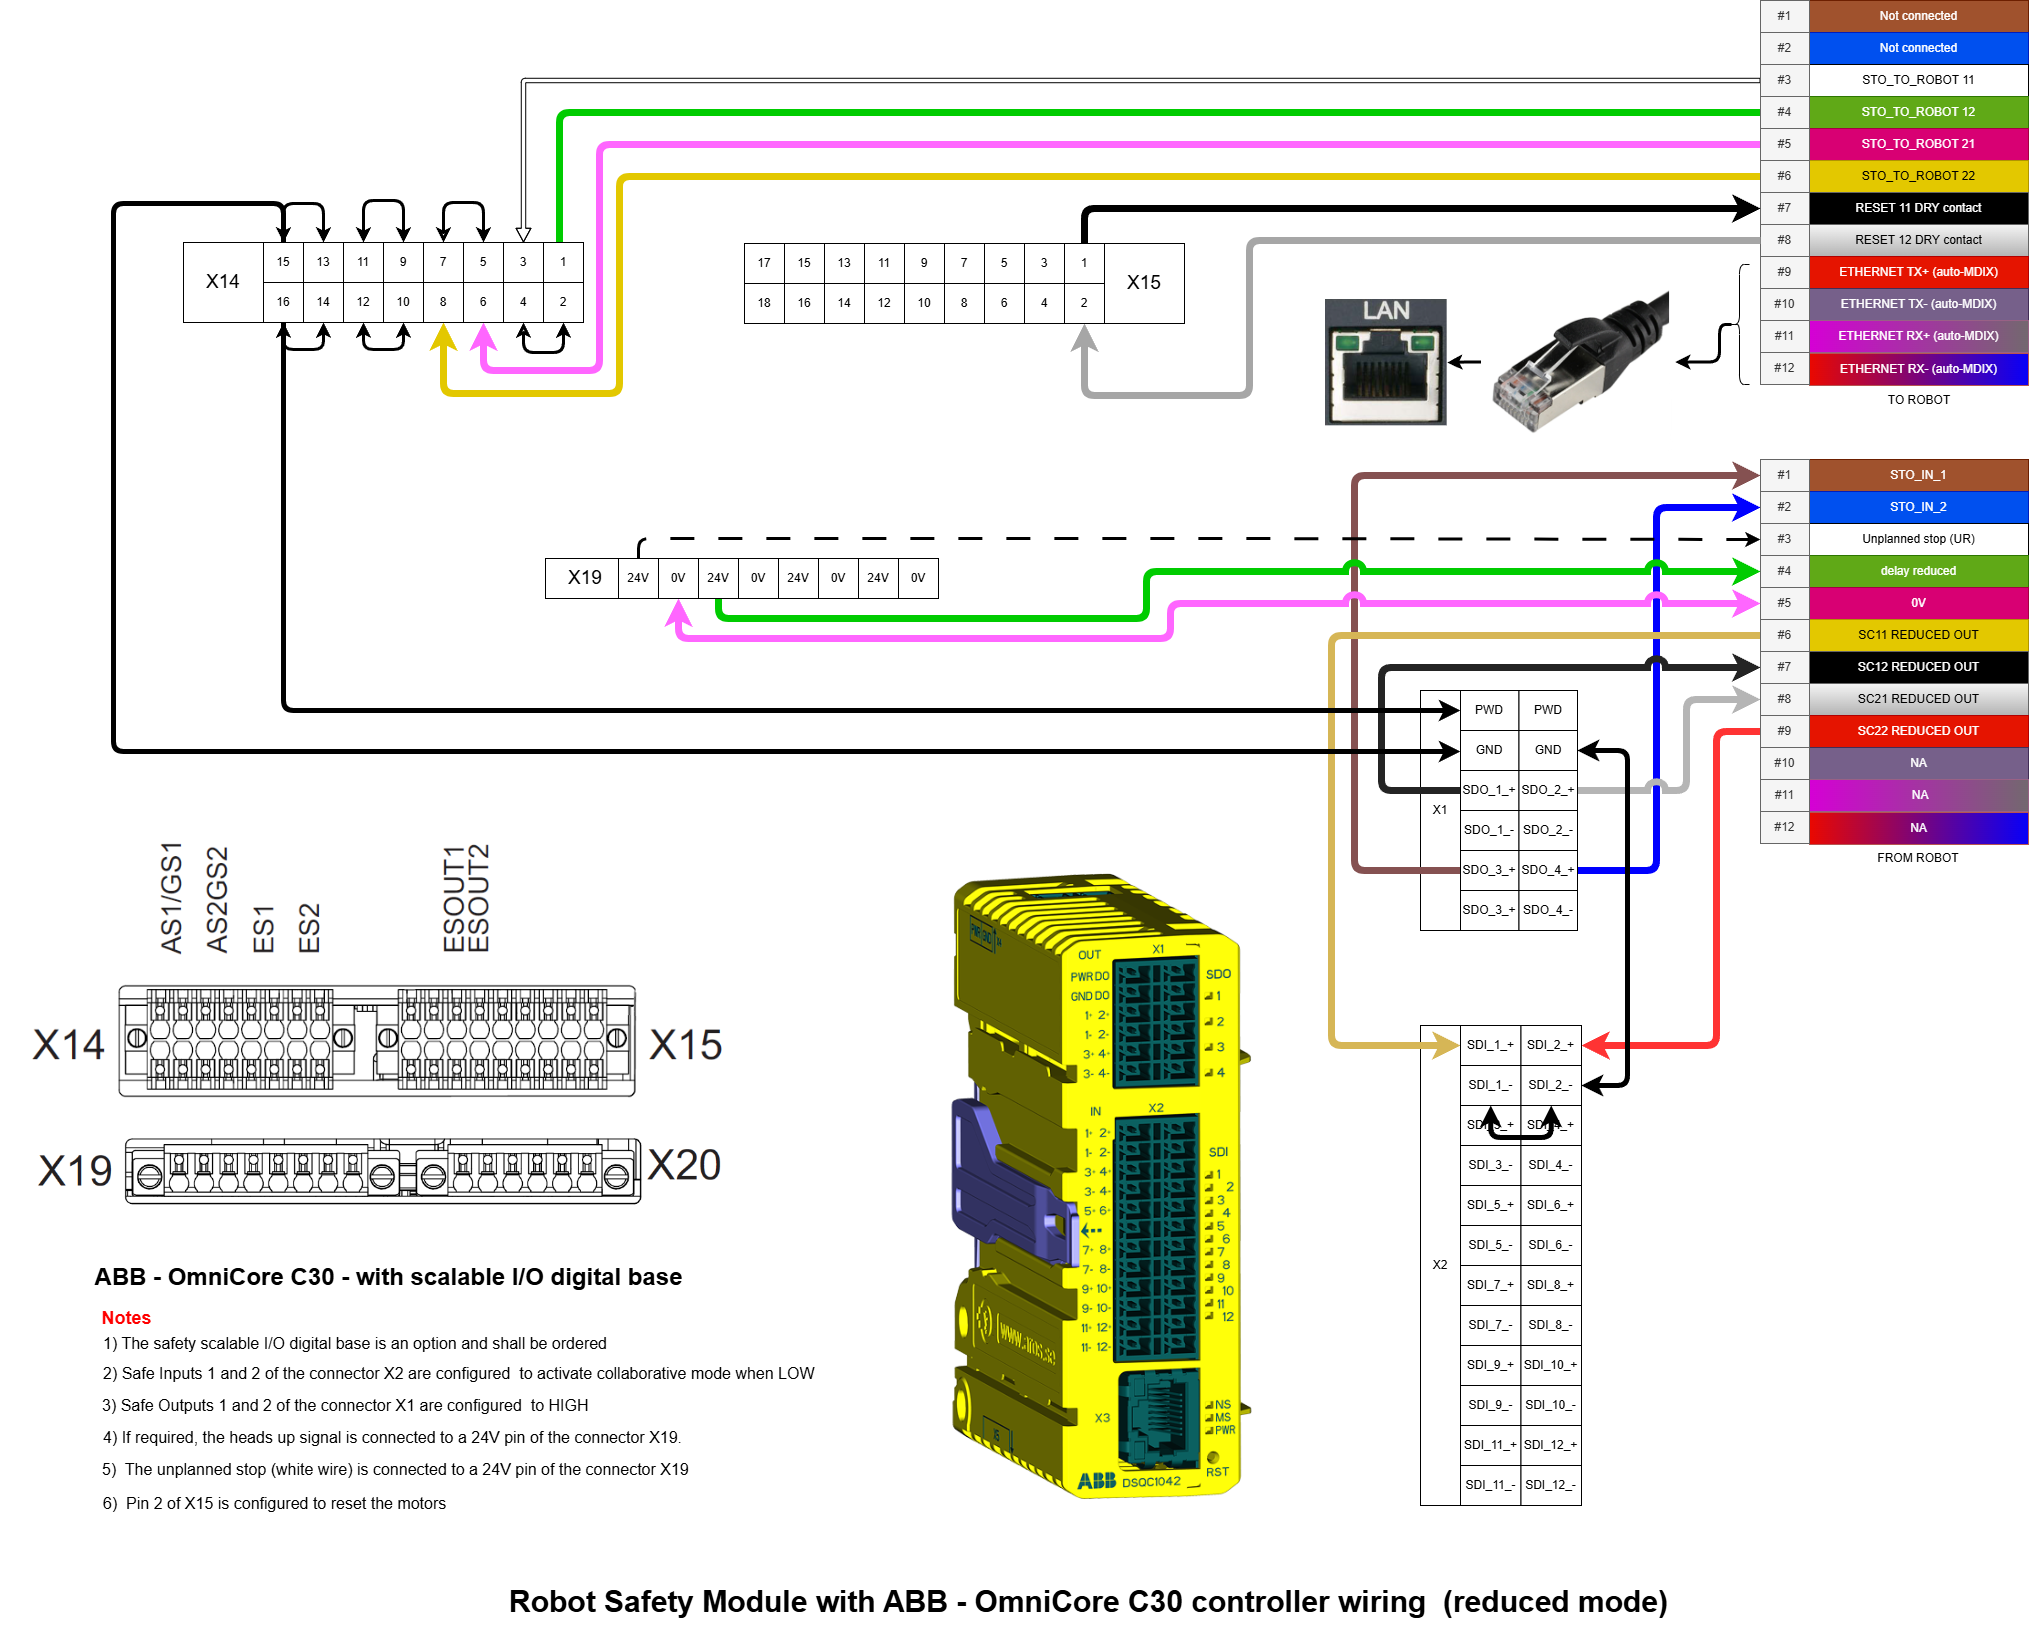
Wiring Diagram - RSM to Omnicore C30
In case your system does not have the ABB safety harness (As described previously in the connection diagram), the following diagram display how to perform the connection between the two devices.
Power Up
After connecting all components, power up the devices in the following order:
Turn on the MachineMotion.
Turn on the Vention Pendant
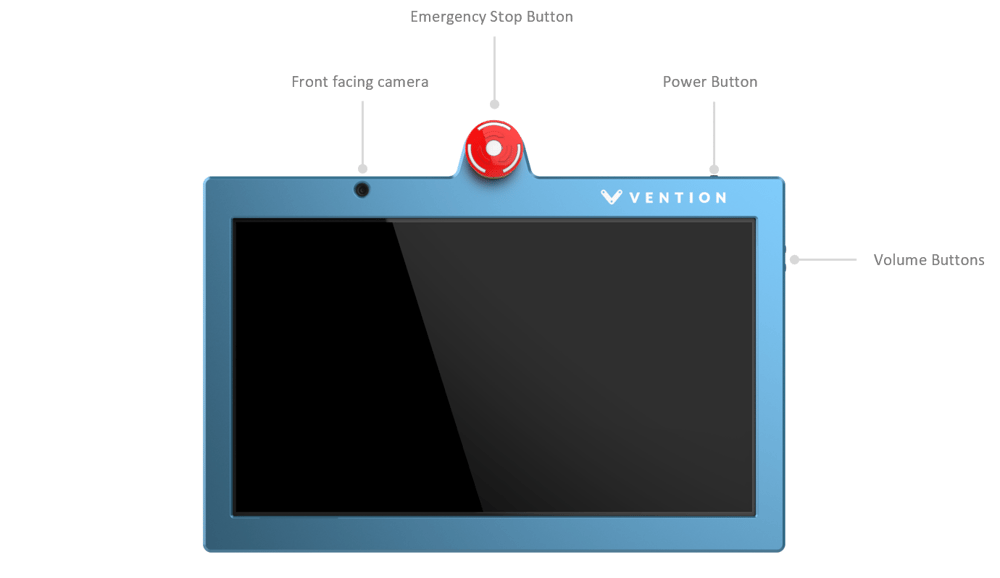
Pendant v3 Front View
Turn on the Omnicore C30 controller using its main switch.
Devices Initialization
Once all devices are properly connected and powered up, we will then proceed to the intialization of each devices to ensure they will function properly.
ABB FlexPendant
Follow these steps to set up the ABB FlexPendant:
Login as Admin on the FlexPendant
Open the Control Panel from the navigation bar
Go to the Logout/Restart menu
Click on Logout
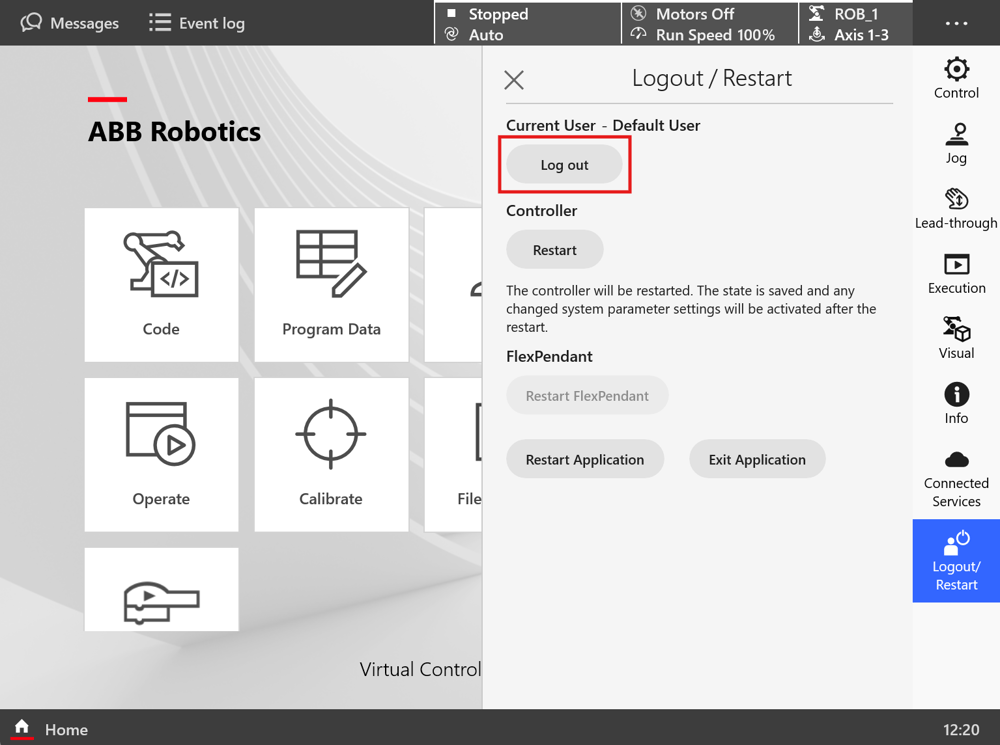
ABB FlexPendant Logout Step
When prompted, login with the admin credentials:
Username: admin
Password: robotics
Click on Log In
Set the operation mode of the robot to Manual:
Open the Control Panel from the top navigation bar.
Go to the Control menu
Set operational mode to Manual
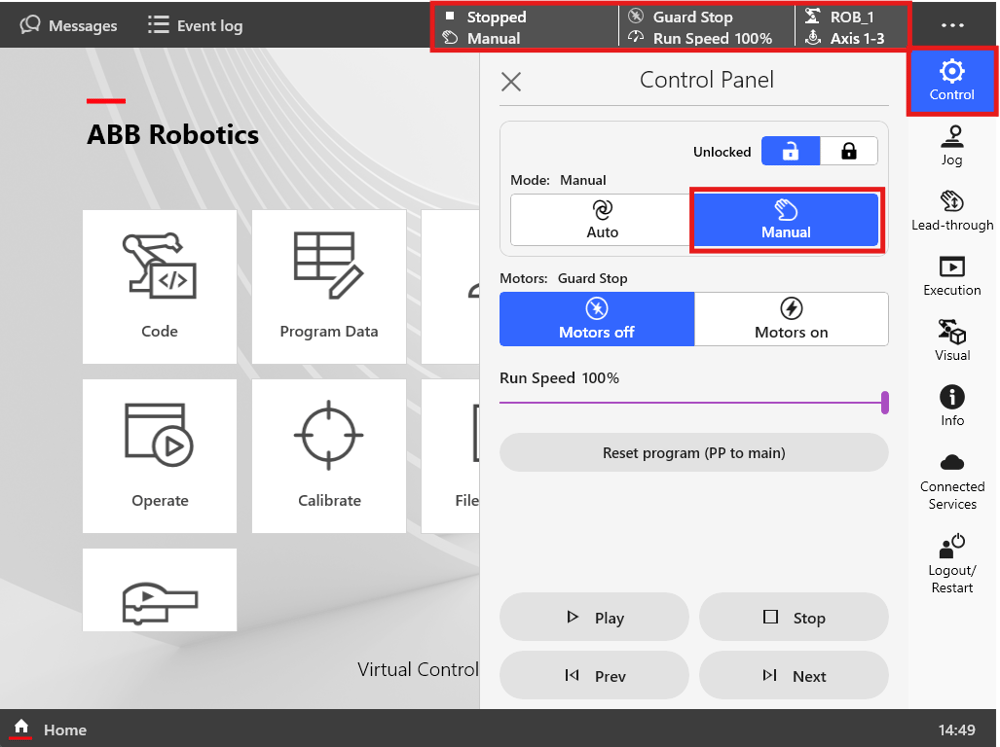
ABB Manual Mode
From the Home page, navigate to Settings -> Safety Controller -> Synchronization.
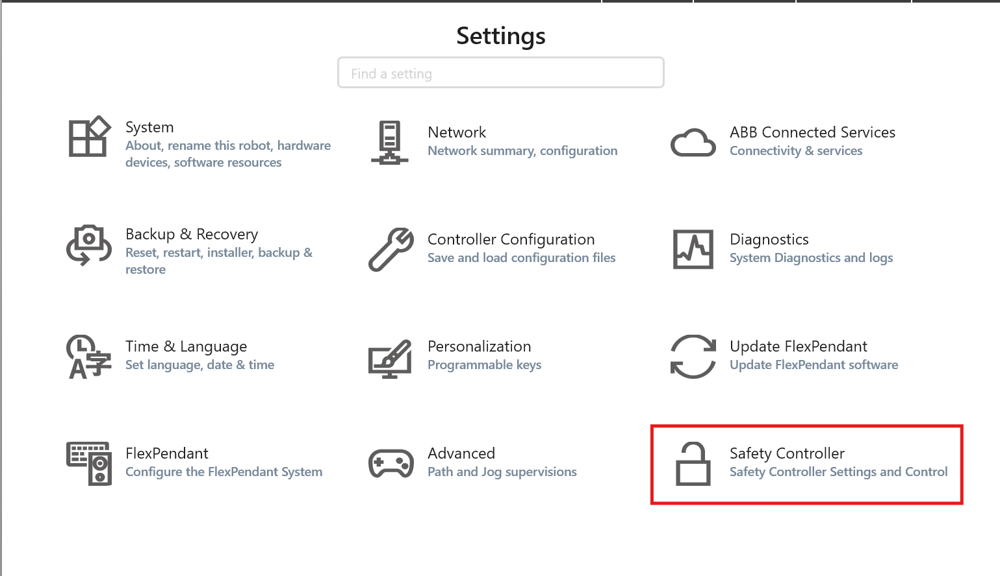
Safety Controller Settings
Enable the motors using the dead man switch in the middle position.
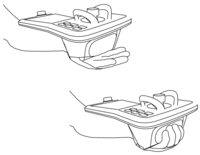
ABB FlexPendant Dead Man Switch
Enable Move to Sync Position.
Press and hold the button to move the robot to its home position. (Warning: The robot will move.)
Once the robot’s Actual Positions match the Sync Positions, press Synchronize.
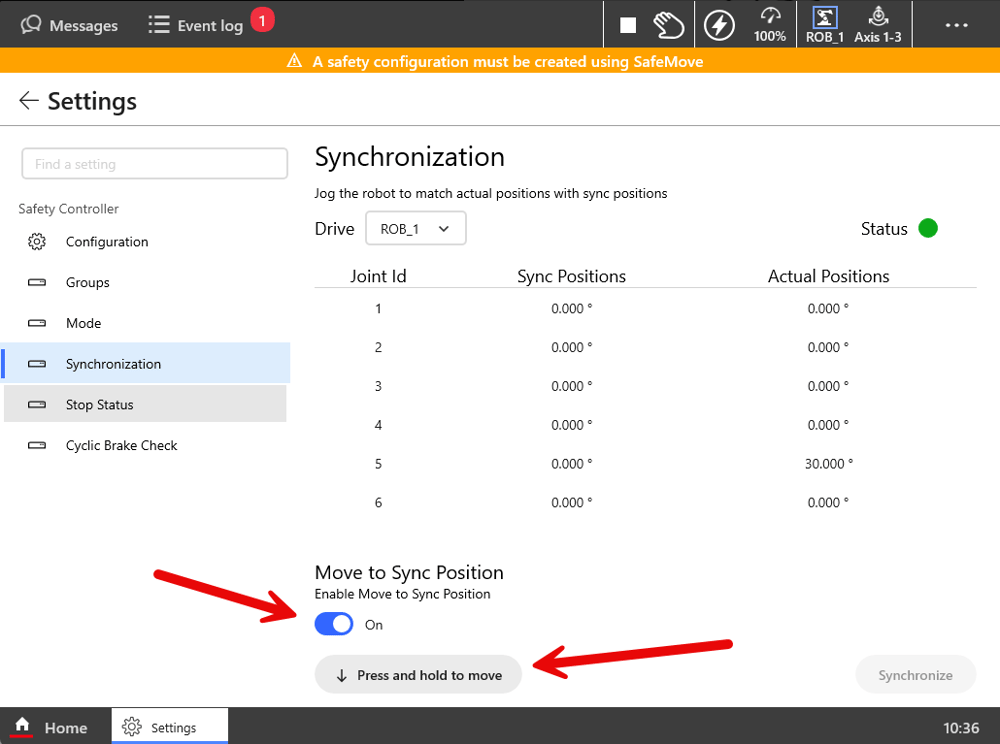
Synchronize Robots Position Page on FlexPendant
Open the Control Panel from the top navigation bar.
Set the mode to Auto under Control -> Auto to allow MachineMotion to control the robot.
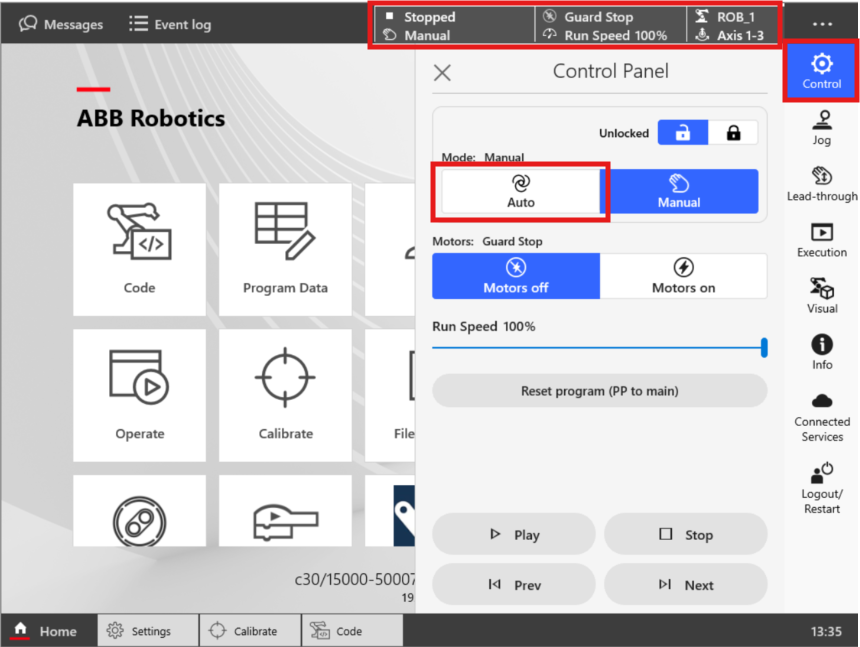
Control Panel on FlexPendant
Vention Pendant
Ensure your MachineLogic application and configuration are deployed before proceeding. Refer to How to Deploy your Application to the MachineMotion.
Validate the configuration:
Click Configuration on the navigation bar.
Confirm that the robot appears and the correct model is selected from the dropdown.
Click Apply Configuration.
Test system control over the robot:
Use the robot jogger found under Manual Control on the Vention Pendant to ensure functionality.
Completion
You have now completed the setup process. Your robot is ready to run applications programmed in MachineLogic.
Additional Information
This section contains advanced information regarding the ABB robot.
Admin Log In
Some advanced configuration can only be done with the admin credentials. Either on the FlexPendant or using ABB’s RobotStudio.
Username: admin
Password: robotics
Modifying the Collaborative Mode Delay
⚠️ Important Safety Notice
Modifying this delay requires approval from a safety engineer and must follow a formal safety risk assessment.
Steps to Modify the Delay:
Open RobotStudio on your computer.
Connect your computer to the robot controller via an Ethernet cable in the MGMT port.
In RobotStudio, navigate to the Controller tab and click on:
Add Controller → One Click Connect
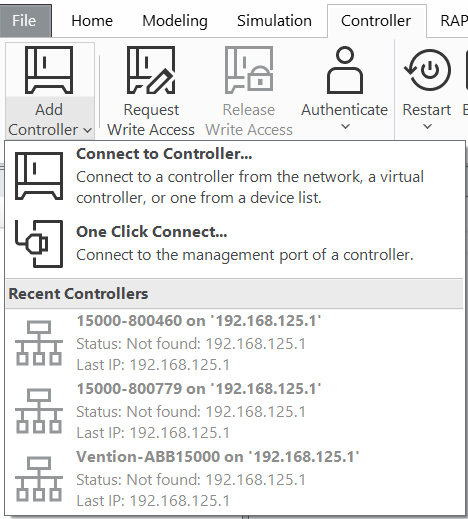
One Click Connect
Once connected, authenticate as Admin. (Refer to authentication instructions if needed.)
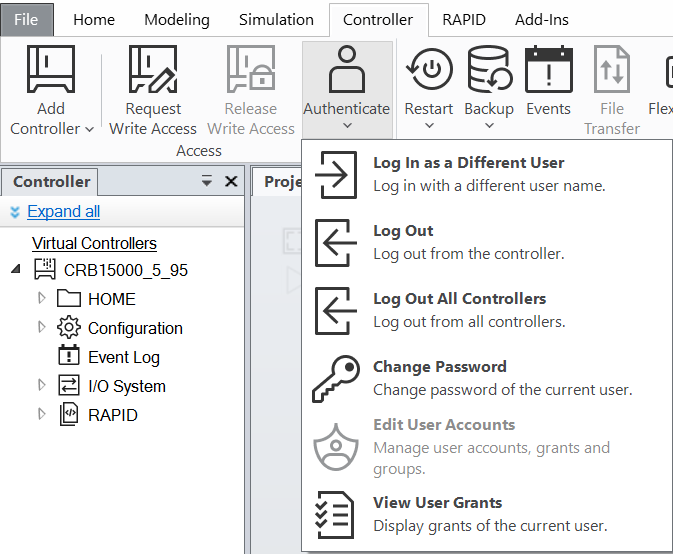
Admin Login
Click Request Write Access, then Grant Write Access on the FlexPendant.
In the main menu, click Safety to access the Safety Configuration.
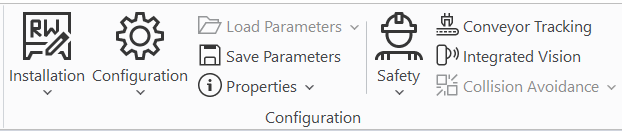
Safety Configuration
Navigate to Safe IO Configuration → Pre-Logic → + New.
Define the expression for the collaborative delay:
Enter the following expression (Example: 300):
V_Coll_Period := 300To calculate the required delay, use the formula:
V_Coll_Period = (TimeInSeconds - 0.015) / 0.003883Example: If the desired delay is 500ms, use:
(0.5 - 0.015) / 0.003883 = 124.9Click Create Missing Formula.

V_Coll_Period Expression
The new expression should now appear in the list.
To apply the new configuration, click Controller → Write to Controller.
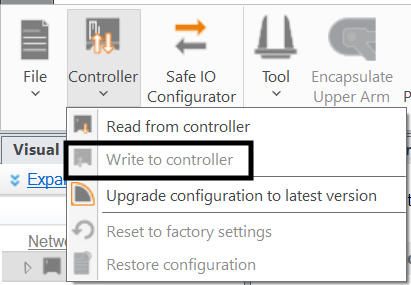
Write to Controller
Restart the controller as prompted to complete the update.
Support
For further assistance, contact our support team:
Email: support@vention.io
Phone: +1-1800-940-3617 (ext. 2)