This guide will show you the basics of inserting a component into your MachineBuilder design using our click-and-click interface.
Inserting a component without connections
Inserting a component requires just two mouse clicks. First, left-click the desired part in the parts library to select it. Then, left-click in your design space to insert it. The part will be added at the clicked location.
|
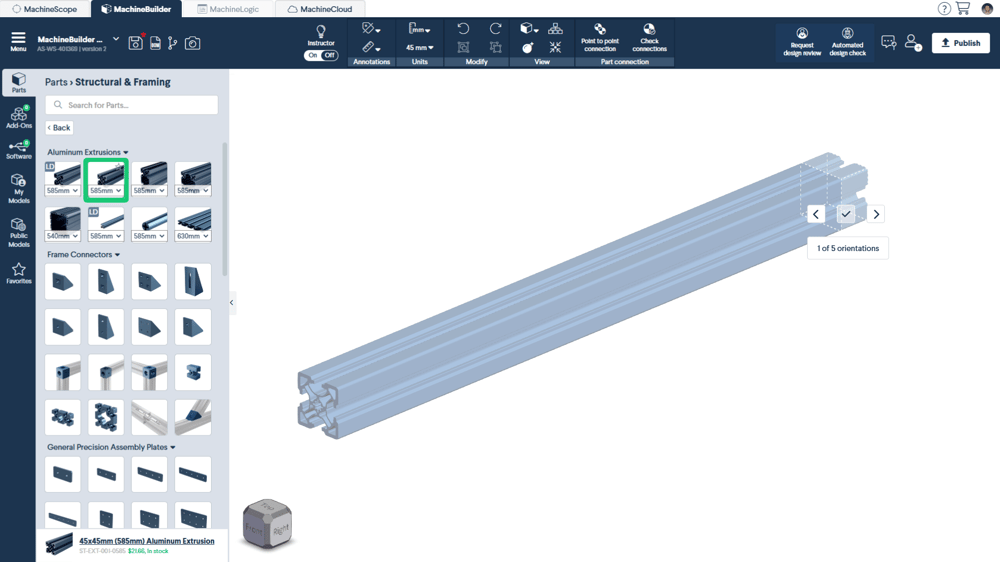
You can adjust the part’s orientation by pressing the left or right arrow keys before inserting it into your design.
Inserting a component with a connection to another part
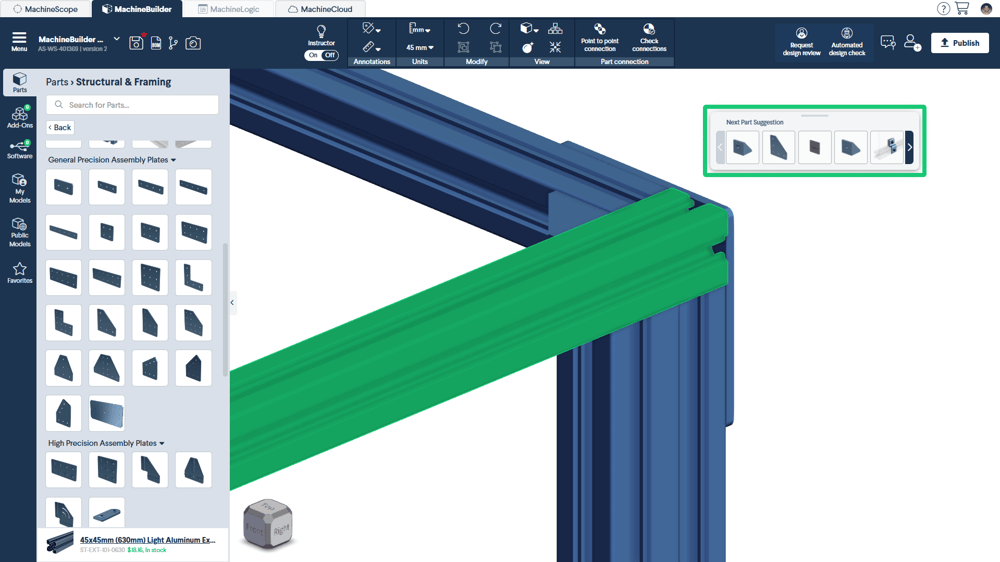
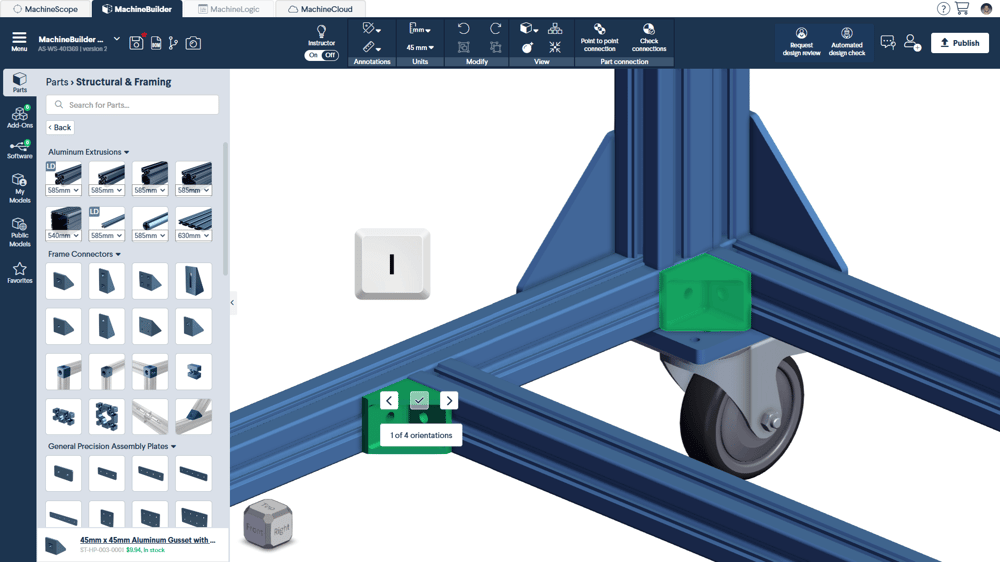
Select your desired part in the parts library by left-clicking on it. Then, move your cursor over to your structure. As you approach, it automatically snaps to the closest point at the preset Snapping Increment. Once snapped, adjust the orientation using the left and right arrow keys on your keyboard or screen. Finally, left-click again to confirm placement.
|

If Part Suggestion is enabled in your settings, you can also select a part from here instead of the parts library with the same effect.
|
Tip
You do not need to insert a part to your design before connecting it to your structure.
Re-inserting a component
Rather than returning to the parts library to select a part for insertion, you can quickly re-insert the most recently interacted with component.
|
Left-click in your design space to insert it. The part will be added at the clicked location.