Overview
Safety devices are essential for a safe work environment. They can be used in various configurations to monitor safety zones where access is limited. Four safety devices (laser scanners, light curtains or fail safe proximity sensors) can be connected to Vention’s Muting Safety Module AI at a time. If you need to interface more safety devices to MachineMotion AI, you can add Muting Safety Modules AI (daisy-chained). Please refer to the User Manual of the Muting Safety Module AI for more information about the connections.
This document covers requirements for the latest version of Keyence Laser Scanner & Light Curtain. For previous version, refer to link below:
Connecting to MachineMotion AI
Keyence SZ-V Laser Scanner to MachineMotion AI
The steps to connect the Laser scanner to MachineMotion AI via the Muting Safety Module AI are as follows:
Connect the Keyence Laser Laser scanner - Parent (Safety Module Compatible) to a Muting Safety Module AI (CE-SA-015-0001__2) through one of the DEVICE connectors using the Keyence SZ-V Laser scanner Power cable 5m to M12-12 Male Cable (CE-SA-120-0001).
Connect a MachineMotion AI Safety Extension Cable (CE-CA-102-5000_3) to the Muting Safety Module AI’s SAFETY OUT connector and MachineMotion AI’s SAFETY IN connector.
If muting is required, connect the muting sensor in pairs to the Muting Sensor Y Adapter. Then connect the adapter to the Muting Safety Module AI via the MUTING xA and MUTING xB connectors. Safety Module Muting Kit (CE-AP-002-0000) is not included with the Muting Safety Module AI.
Note: If no other safety modules are being daisy-chained to the Muting Safety Module AI, a safety jumper (CE-SA-102-0001) must be used on the Muting Safety Module AI’s SAFETY IN connector. Safety Device Jumper (CE-SA-125-0001) must be connected to the unused DEVICE connectors.
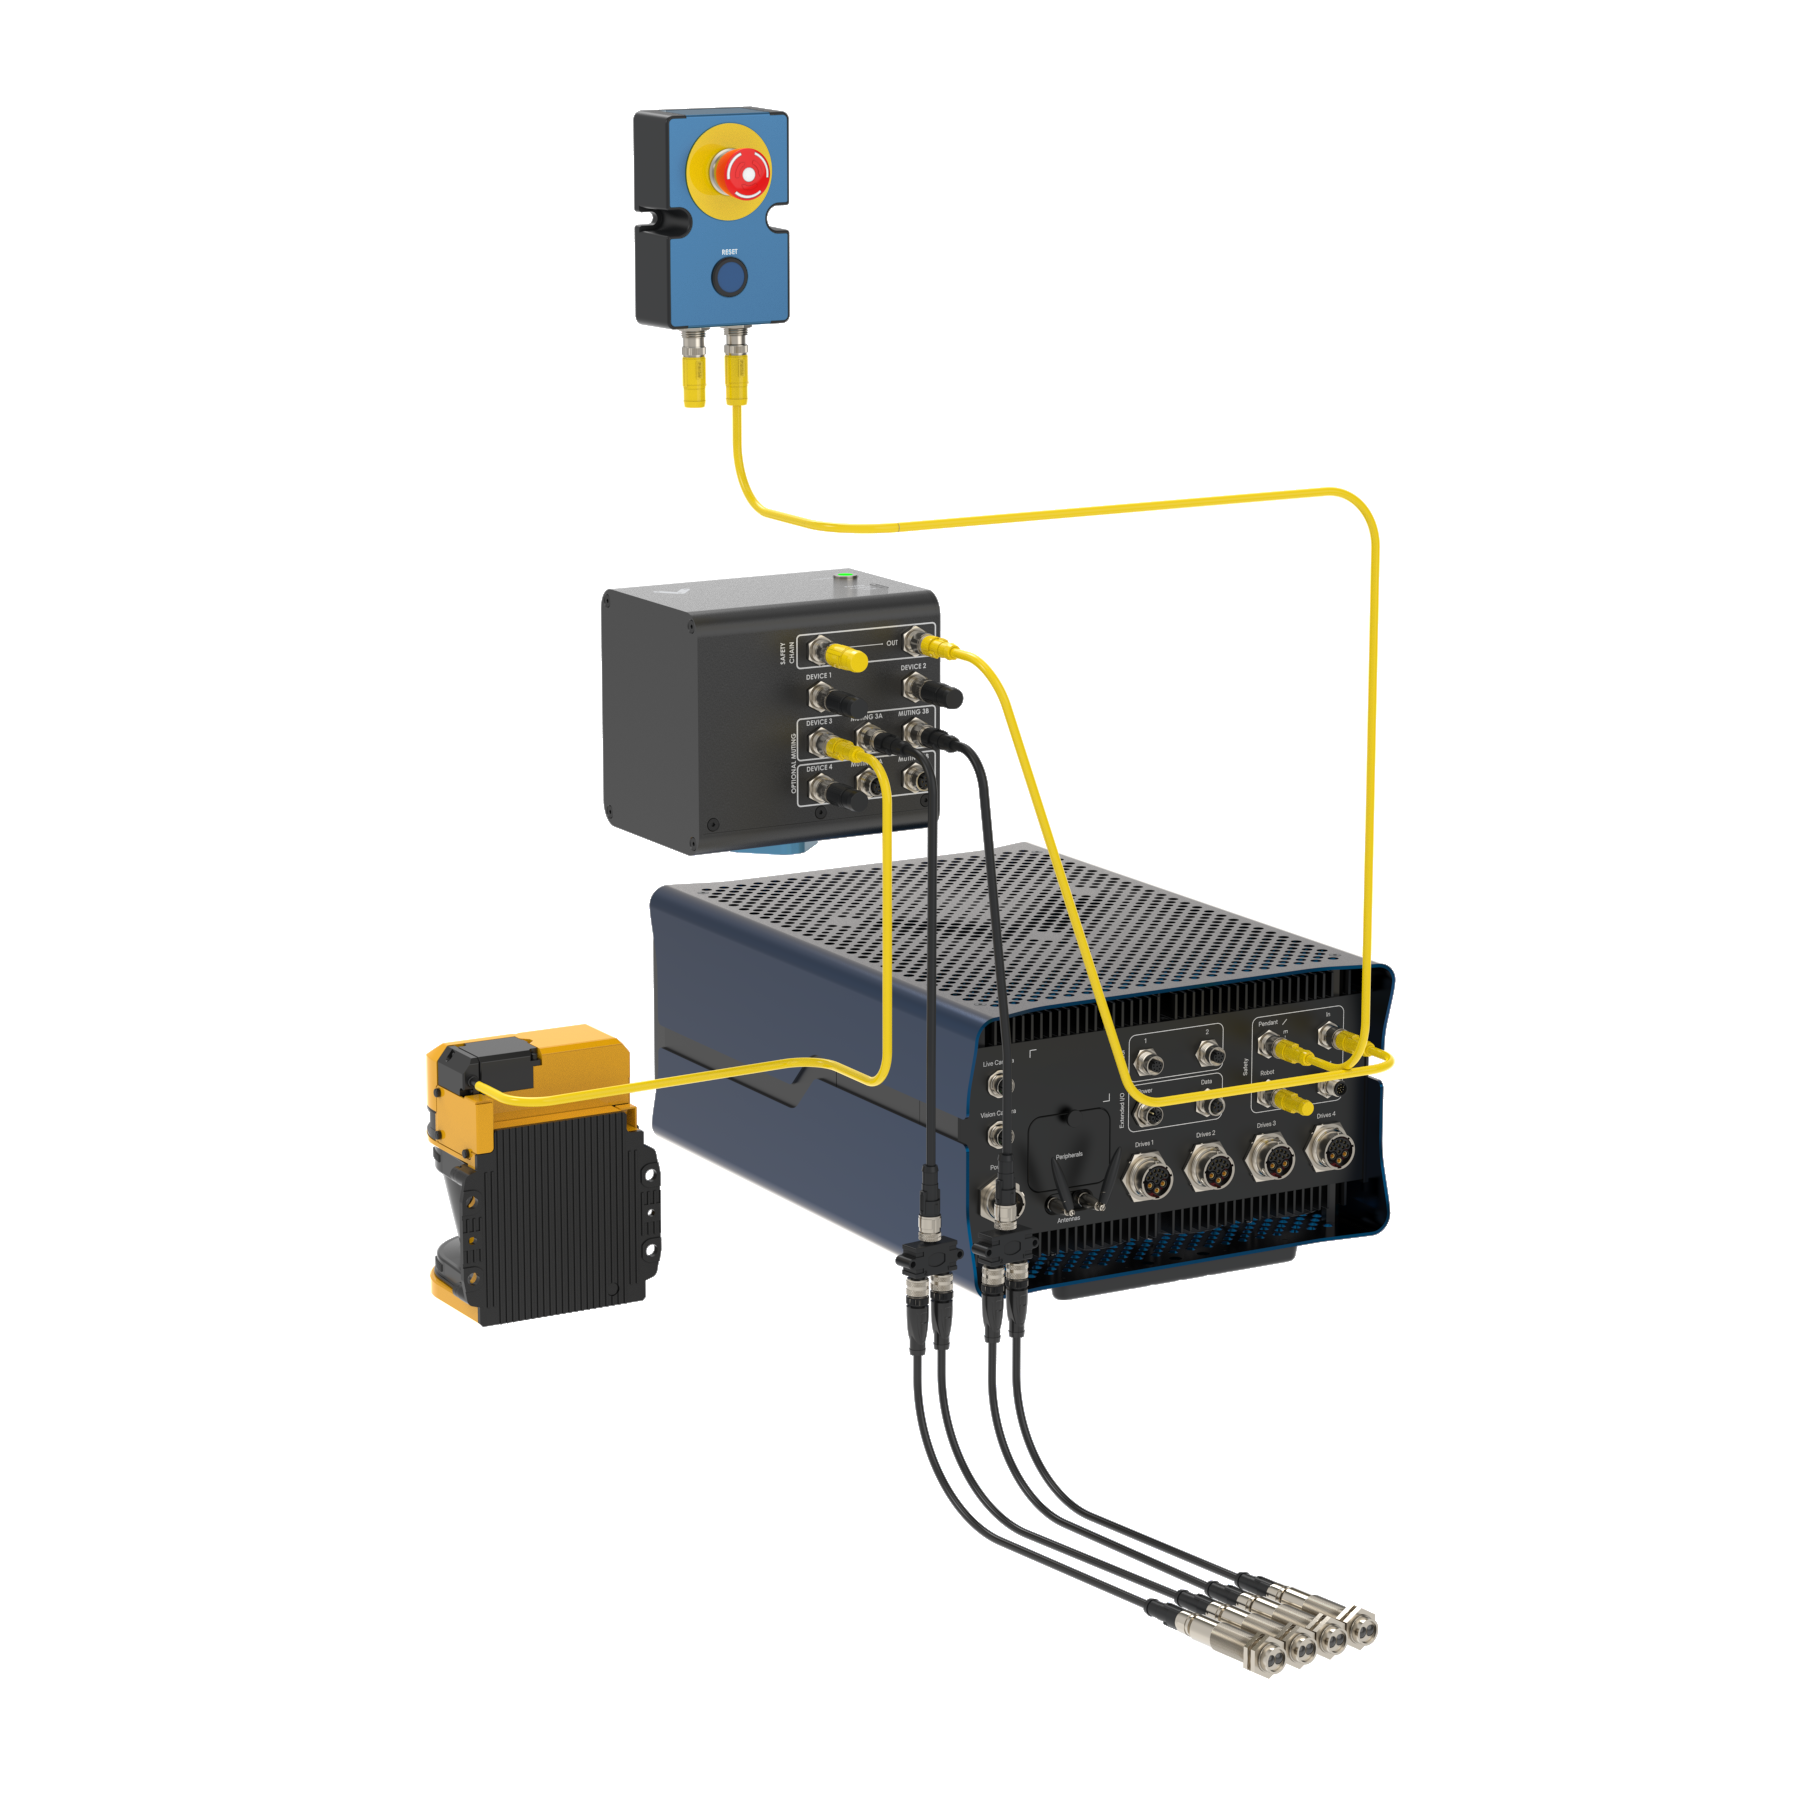 Keyence Laser Scanner (Parent only) wiring diagram |
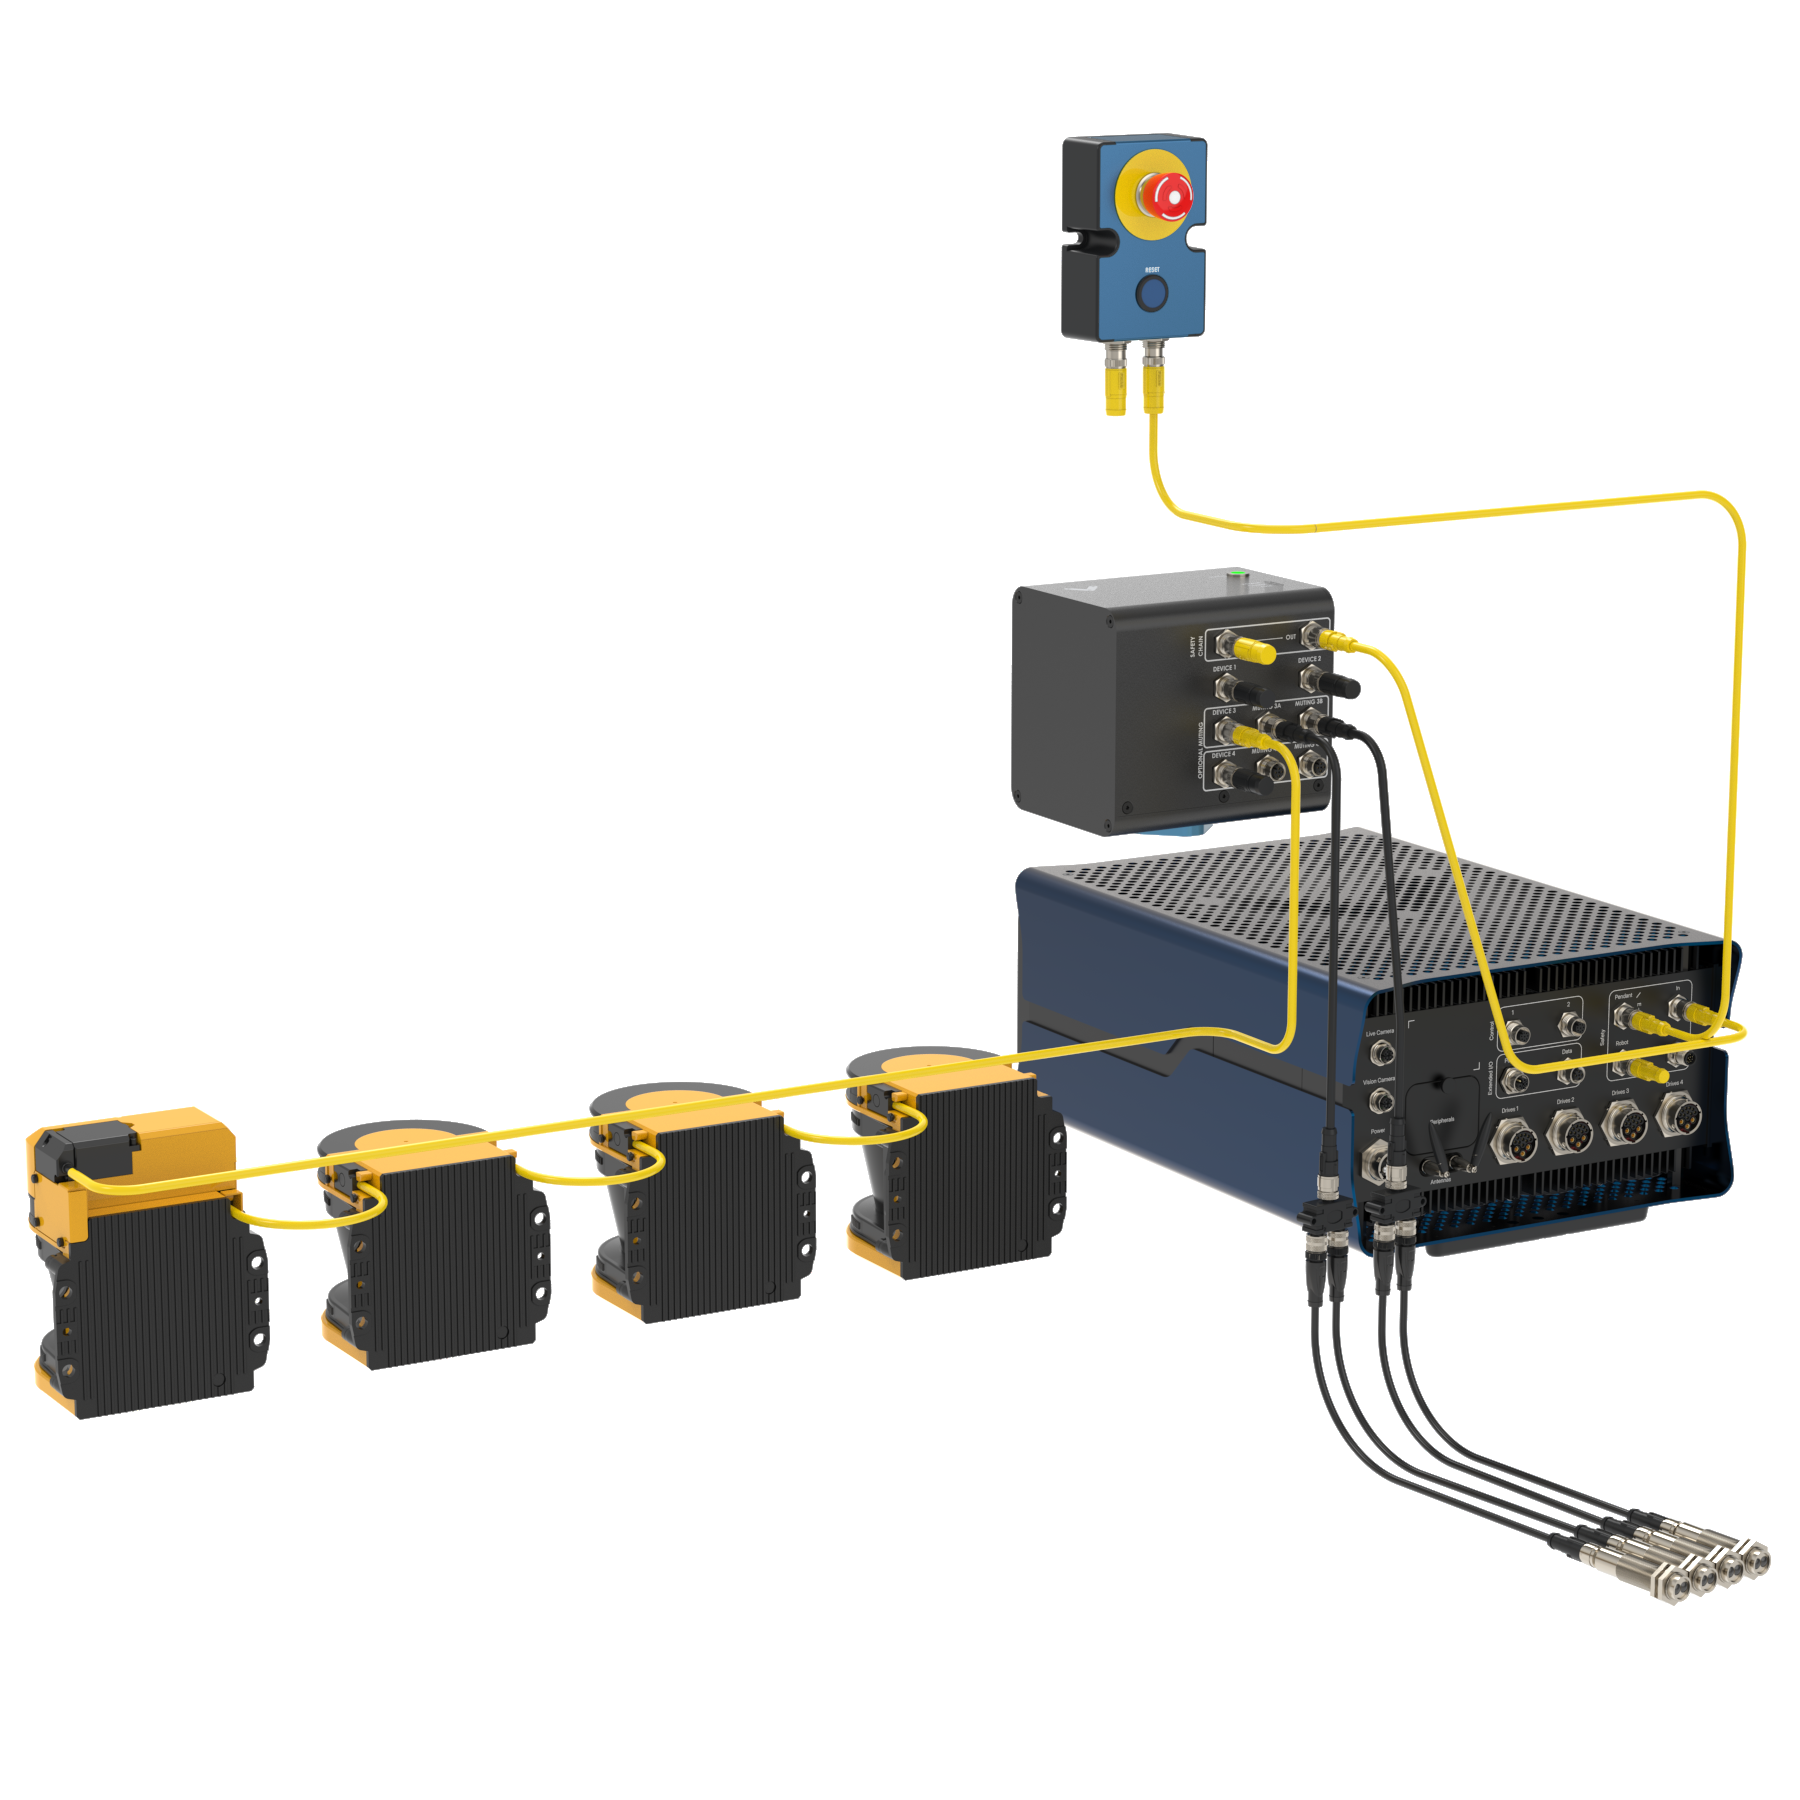 Keyence Laser Scanner (Parent-Child cluster) wiring diagram |
Keyence GL-R Light Curtains to MachineMotion AI
The steps to connect Keyence GL-R Light Curtains to MachineMotion AI via the Muting Safety Module AI are as follows:
Connect the receiver and the emitter to CE-SA-118-0001 cable using 2 × CE-SA-119-0001 (one for the receiver and one for the emitter). Then, connect CE-SA-118-0001 to one of the Muting Safety Module AI’s DEVICE connectors.
Connect a MachineMotion AI Safety Extension Cable (CE-CA-102-5000__3) to the Muting Safety Module’s SAFETY OUT connector and MachineMotion AI’s SAFETY IN connector.
If muting is required, connect the muting sensor in pairs to the Muting Sensor Y Adapter. Then connect the adapter to the Muting Safety Module AI via the MUTING xA and MUTING xB connectors. Safety Module Muting Kit (CE-AP-002-0000) is not included with the Muting Safety Module AI.
Note: If no other safety modules are being daisy-chained to the Muting Safety Module AI, a safety jumper (CE-SA-102-0001) must be used on the Muting Safety Module AI’s SAFETY IN connector. Safety Device Jumper (CE-SA-125-0001) must be connected to the unused DEVICE connectors.
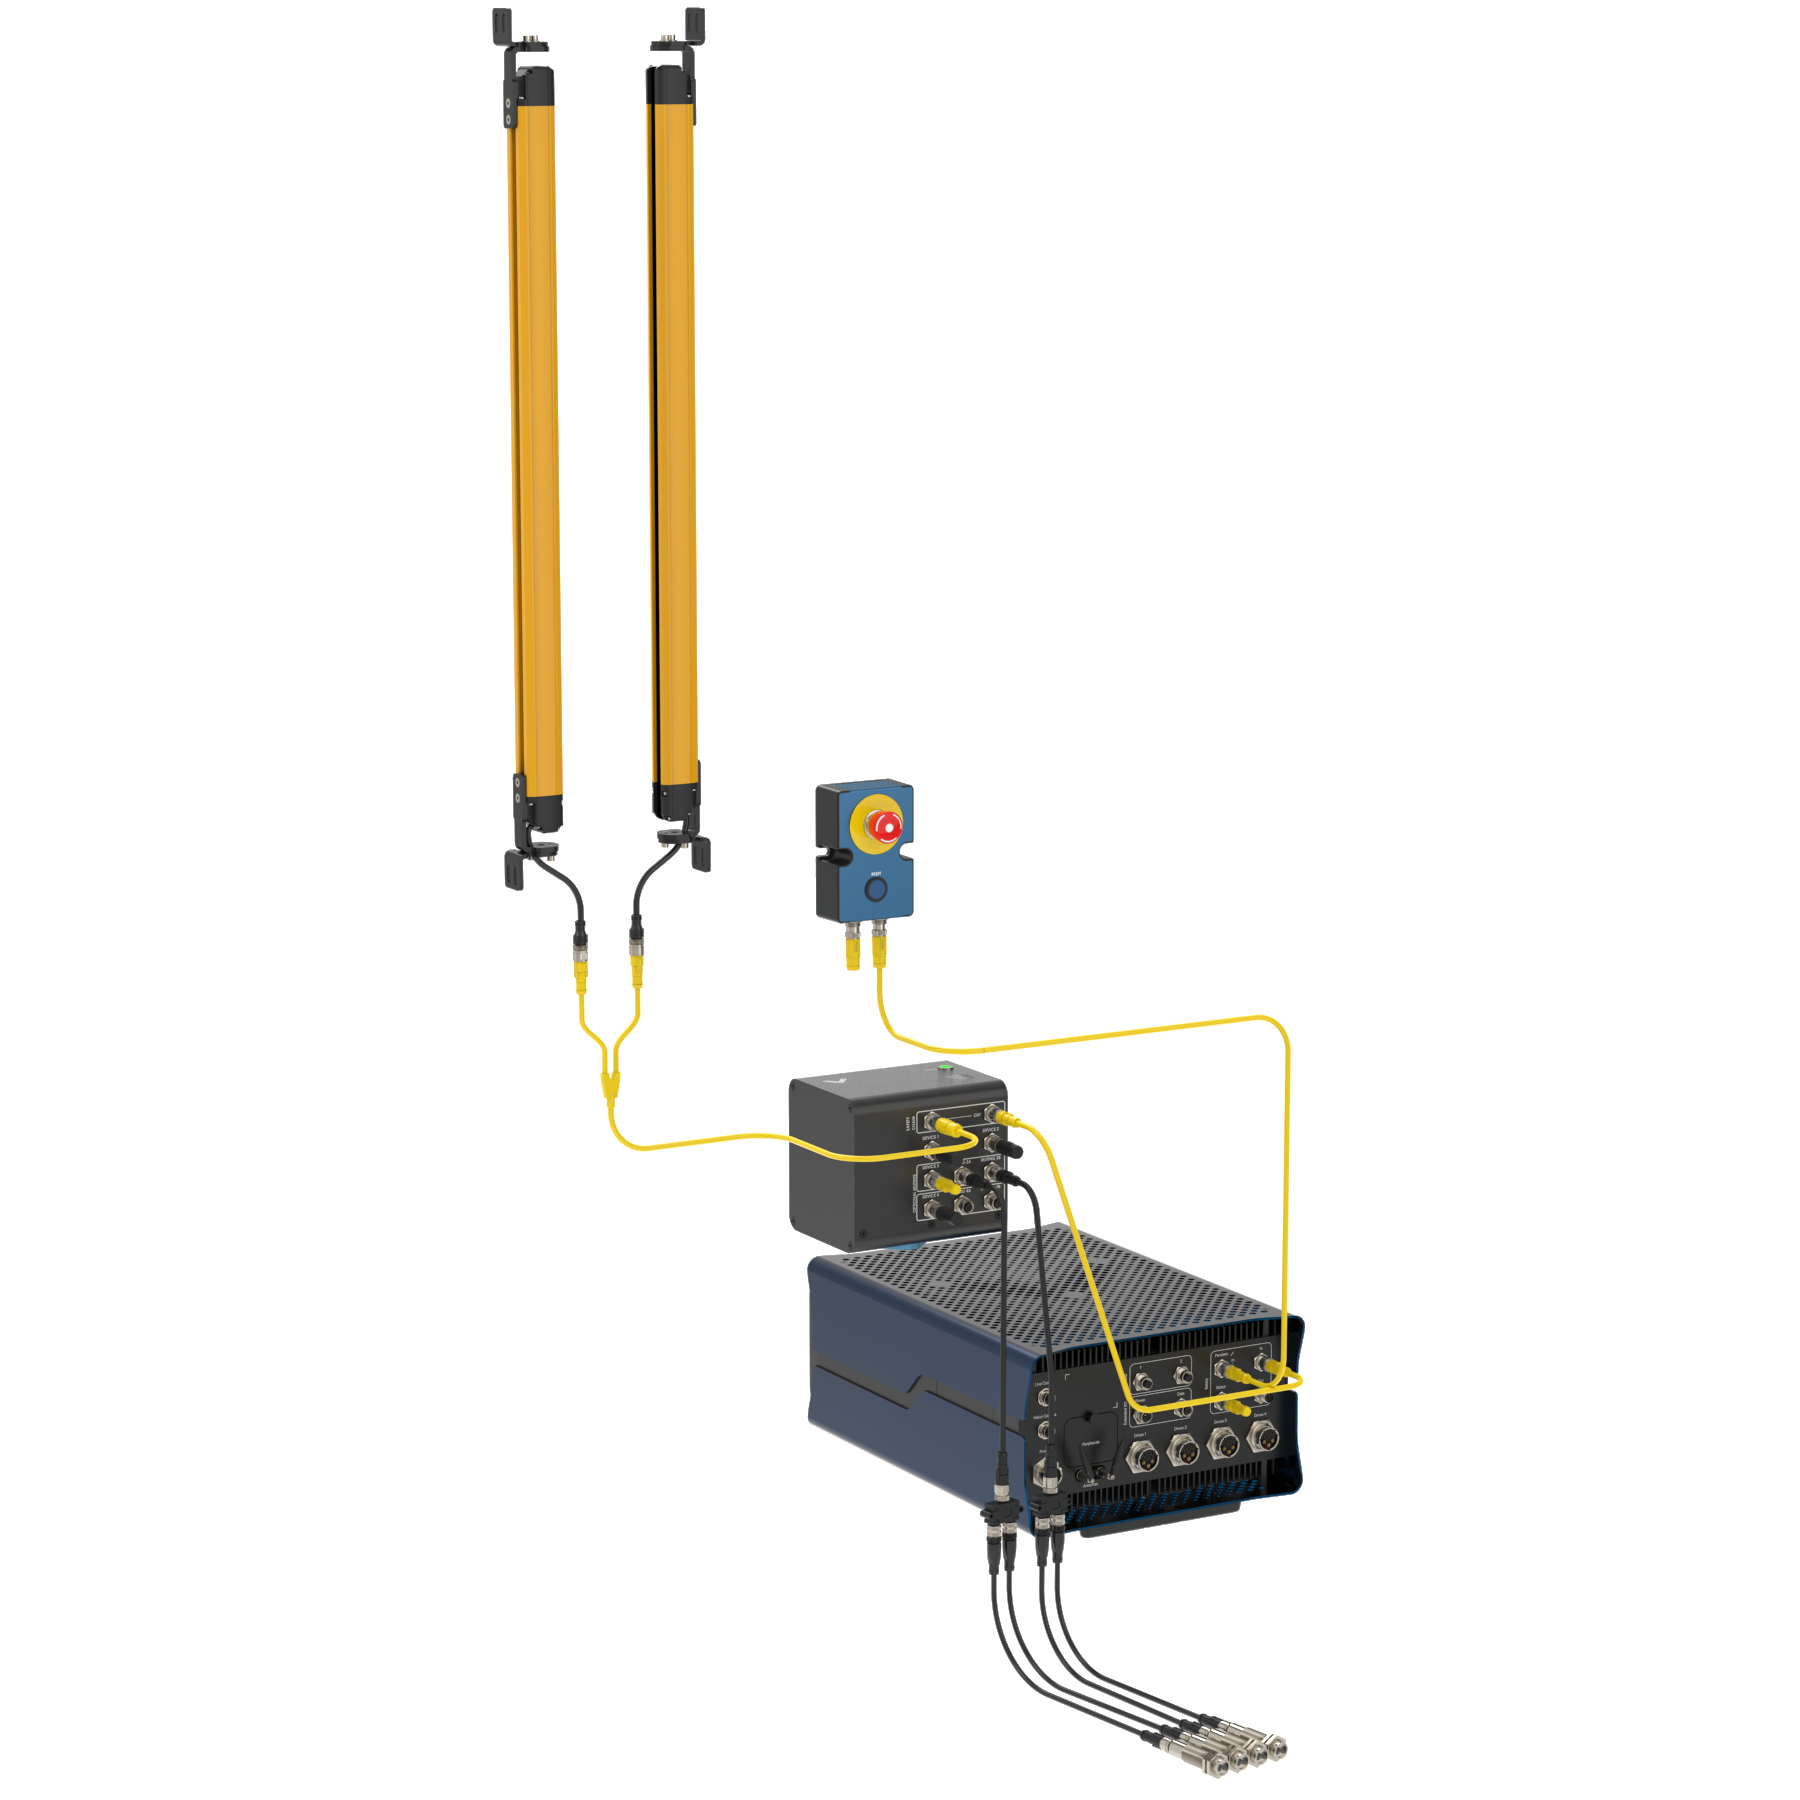 Keyence Light Curtain wiring diagram |
Keyence Laser Scanner SZ-V04 (Parent) & SZ-VH1 (Child)
Description
The Keyence Laser Scanner (SZ-V04 ) is an essential tool to ensure safety in the workplace. It can be used in multiple orientations to monitor large areas while remaining discreet and unobstructive. It will stop a machine if any undesired person or object crosses its safety zone. It features a couple of useful functionalities such as muting; automatically deactivates the safety status of the whole system (total muting) or part of it (partial muting) to let material pass through. Another useful function is bank switching; ability to switch between two zone configuration (useful for muting two zones independently). A PC with an Ethernet port is required for configuration.
In order to use the Laser Scanner with MachineMotion AI, a Muting Safety Module (CE-SA-015-0001__2) is required, please refer to the safety installation guideline section for the wiring.
The Laser Scanner specifications are as follows:
Maximum safe zone: 8.4 m radius.
Maximum warning zone: 26 m radius.
Detection angle: 190°.
Total/partial dynamic muting optional kit available (CE-AP-002-0000).
Zone switching (bank switching) available with the purchase of the CE-CA-067-5000 cable.
Getting Started
Assemble the Laser Scanner bracket and mount it at the desired location.
Download the latest version of KEYENCE Safety Device Configurator software here
Install the KEYENCE Safety Device Configurator by following the installation instructions
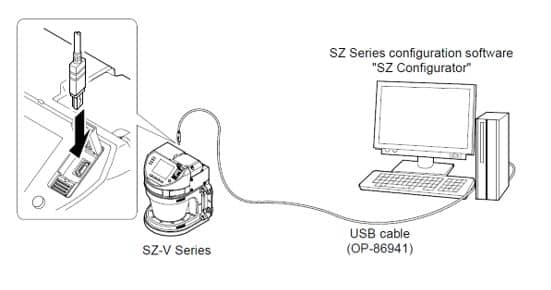
Connect the laser scanner to PC using the provided USB cable
Figure 1
Power the MachineMotion controller
While the laser scanner is powered, open the KEYENCE Safety Device Configurator
Select Create a new configuration file and click OK
Figure 2
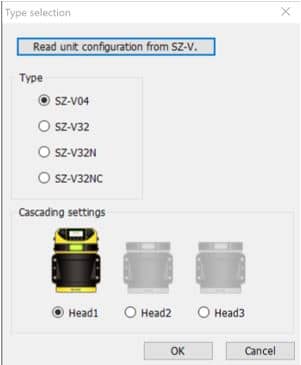
Select the model of the laser scanner you have (SZ-V04 for parent, SZ-VH1 for child) and click OK
Figure 3
In the Setting menu, select on Operation
Figure 4
In the Safety configuration section, select the compatible input type as PNP and Interlock as Automatic/Automatic (when used with a Vention Safety Module), leave EDM as Not used
Figure 5
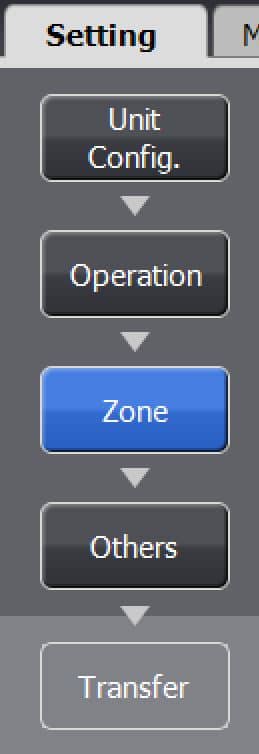
In the Setting menu, select Zone to configure the safety zone of the scanner
Figure 8
Draw the desired protection and warning zones using the Drawing Tools menu in the right side of the screen. If the Muting function is enabled, the muting zone should also be configured in this step using the tools on the right side menu
Figure 9
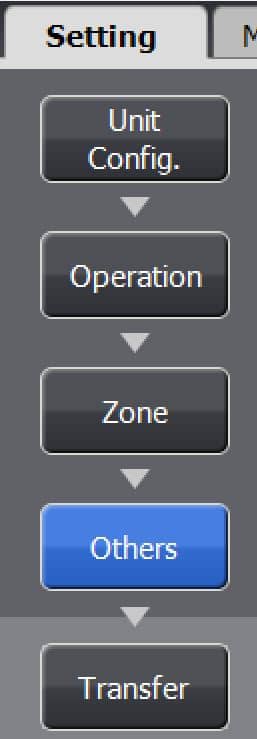
Once completed click on the Setting menu, select Others
Figure 10
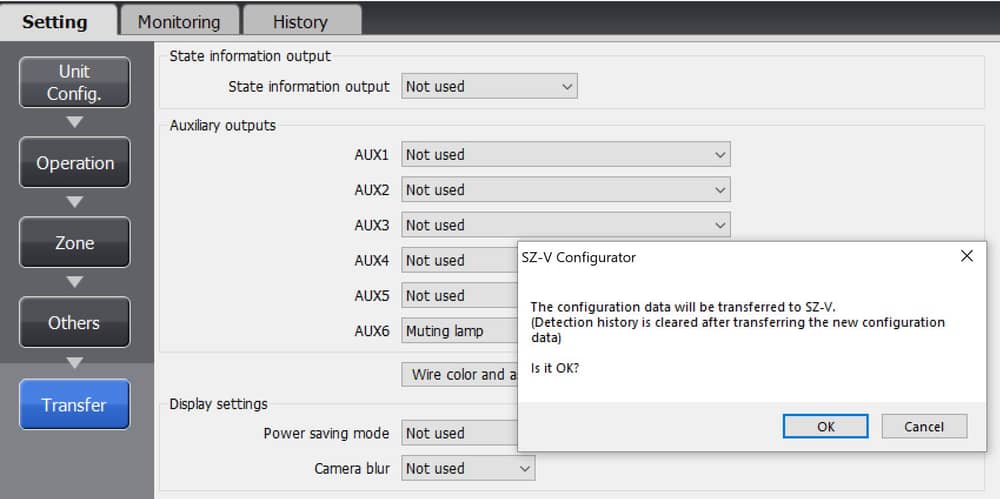
Next, click on Transfer as shown below
Figure 12
Click OK
Enter your new Password. (The default password is set to 1111)
Click OK
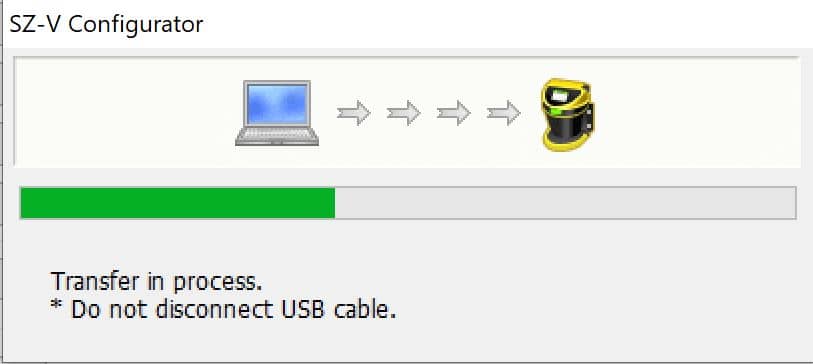
The configurator software will load the new configuration file onto your connected laser scanner
Figure 13
Select OK and Accept the configuration data
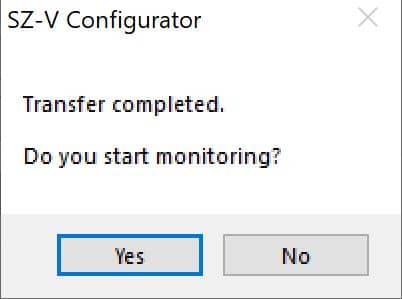
When the configuration file transfer is completed, select Yes to start monitoring
Figure 14


Keyence GL-R 745mm, 1465mm & 1900mm Light Curtains
Description
The Keyence Light Curtain (GL-R ) is an essential tool to ensure safety in the workplace. It can be used in multiple orientations to monitor large areas while remaining discreet and unobstructive. It will stop a machine if any undesired person or object crosses its safety zone. Muting is also available with the purchase of the Safety Module Muting Kit (CE-AP-002-0000). In order to use the Light Curtain with MachineMotion AI, a Muting Safety Module (CE-SA-015-0001__2) is required, please refer to the safety installation guideline section for the wiring. The Light Curtain specifications are as follows:
Detection capability: ø25 mm
Beam axis spacing/Lens diameter: 20 mm / ø5
Detecting distance: 0.2 to 15 m
Effective aperture angle: Max. ±2.5° (When operating distance is 3 m or more)
Total/partial dynamic muting optional kit available (CE-AP-002-0000).
Getting Started
Choose an appropriate position for the light curtain, and mount both the emitter and the receiver with the connectors pointing in the same direction using the two included mounting brackets (GL-RB02).
The light curtain should be carefully positioned to provide the necessary protection. Access to the dangerous area must only be possible by passing through the light curtain safety zone.
Configuring Keyence Light Curtains is not needed when using the provided cables (2x CE-SA-119-0001 and CE-SA-118-0001).
Safety Installation guidelines
Light curtains or laser scanners must be installed in compliance with the standard ISO 13855 - 2024, Safety of machinery — Positioning of safeguards with respect to the approach of the human body and a risk assessment must be performed to unsure suitability to the application.
Muting
The muting function automatically deactivates the safety status of the whole safety area (total muting) or part of it (partial muting). This feature is particularly suitable when an object, but not a person, has to pass through the dangerous area. This feature also allows carrying out cyclical operations without blocking a working machine.
Muting sensors must be placed according to the material’s length and speed so they can recognize passing objects (such as pallets, vehicles, etc). When using the Muting Safety Module AI, four muting sensors are required to perform a bidirectional muting.
Bidirectional muting is used for objects entering and leaving an area. In this case, four sensors must be used: two on one side of the safe zone (A1 and B1), and two on the other side (A2 and B2). Sensors A1 and A2 are connected together, and B1 and B2 are connected together. They should be spaced at a distance where two consecutive sensors are always triggered throughout the movement of the object across the safety zone.
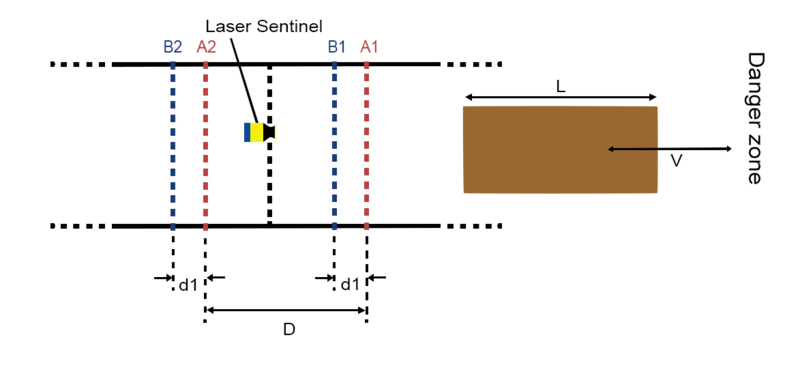 Figure 18: Bidirectional muting |