|

Overview
This guide covers the function, assembly, and use of Vention’s precision telescopic slide ecosystem.
Applications
These slides are typically found in machine-tending applications that require high rigidity and repeatability. Using these slides, drawers can be constructed to hold a large variety of parts.
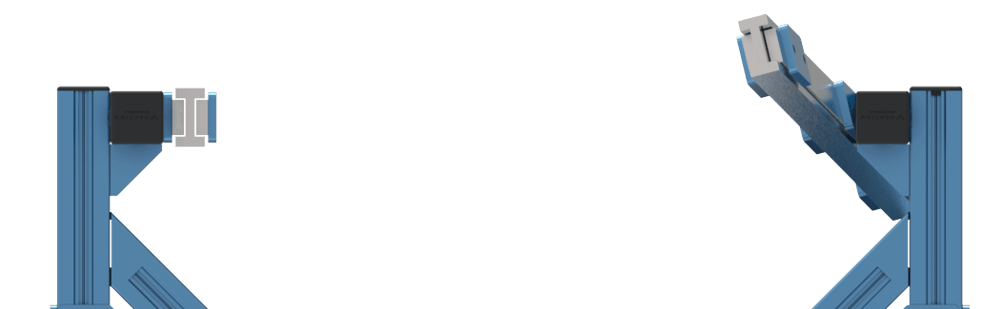
The slides feature bi-directional opening, which is a key feature for easy loading and unloading.
Technical Specifications
Load capacity (per pair) | 230 kg |
Open length | 1364 mm |
Closed length | 700 mm |
Positional accuracy (with indexing system) | +/-0.03 mm |
Bi-directional opening | Yes |
Slide Indexing System
Precision telescopic slides do not have a built-in catch to hold them open or closed. Vention offers an indexing system for this function (part number MO-LM-034-XXXX). We recommend adding at minimum a catch for the closed position, to prevent the drawer from sliding open unintentionally.
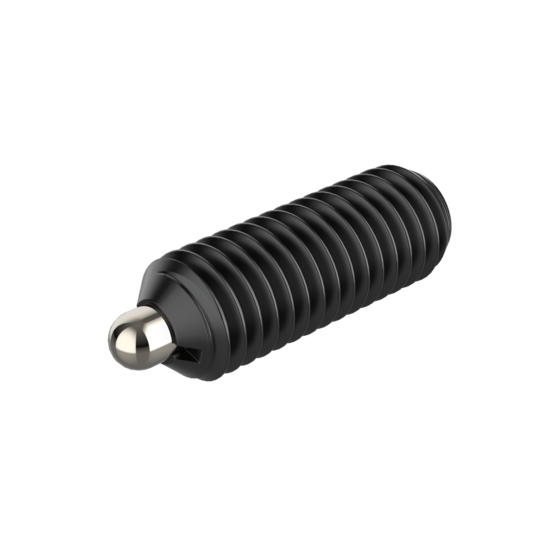
Adding indexing to your slide allows the accurate positioning of a drawer, which allows a robot to load or unload. Without these parts, a robot will be unable to pick parts out of the drawer reliably. The basic parts of this system are a Spring Plunger (MO-LM-034-0002) and Catch (MO-LM-034-0001). Below are a few ways that they can be employed. See the table below for the number of catches and plungers required to achieve a given number of indexing positions. An indexing position is any place where the drawer or slide must stay positioned.

Number of indexing Positions | Catches (number required) | Spring plungers (number required) |
1 | 1 | 1 |
2 | 1 | 2 |
3 | 2 | 2 |
Machine Tending Slide Indexing System
There are three positions that can be achieved with a machine tending drawer system, robot-side, closed, and operator-side. While the robot tends the parts with a drawer open on the robot-side, an operator can open a drawer on the operator-side to remove machined parts and refill with raw parts. Drawer systems can be manual or automated, and locking mechanisms allow for high repeatability.
For manual systems, the robot arm simply pushes or pulls the drawers in and out as needed. An indexer system using plungers and catches is needed to ensure the positioning is accurate. To reduce the inertial load on the cobot during the drawer opening and closing process and ensure accurate positioning, the Machine Tending Indexer Catch along with an Indexer Spring Plunger can be used. When spacing these indexers, they should be located as shown:
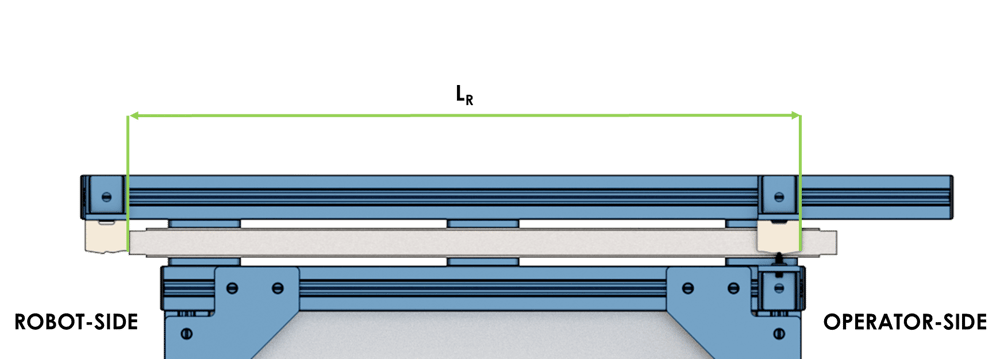 Lr (Indexer spacing for Robot-side) = 664mm |
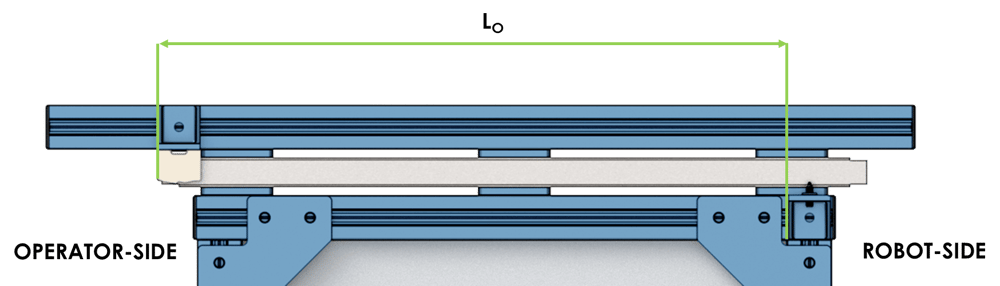 Lo (Indexer spacing for Operator-side) = 664mm |
When designing and assembling a cobot drawer system, ensure that smoother sides of the indexer catches are both facing the inside of the drawer. This will ensure that the cobot will have to overcome a much lower force to open and close, while also guaranteeing that the start and end points are clear.

Number of indexing Positions | Catches (number required) | Spring plungers (number required) |
1 | 1 | 1 |
2 | 2 | 1 |
3 | 3 | 2 |
Adjusting the Spring Plunger
To ensure that the slide indexing system can easily slide and be locked into the indexer catch without too much force, it is imperative that the spring plunger’s depth and spring force is adjusted correctly.
Pass the spring plunger (MO-LM-034-0002) through the HP gusset that will interface with the indexer catch.
Fasten the provided nuts from both sides and tighten them against the gusset. Adjust the plunger depth until it is fully seated in the catch, as shown in the photo below. Tighten the nuts once this has been achieved.
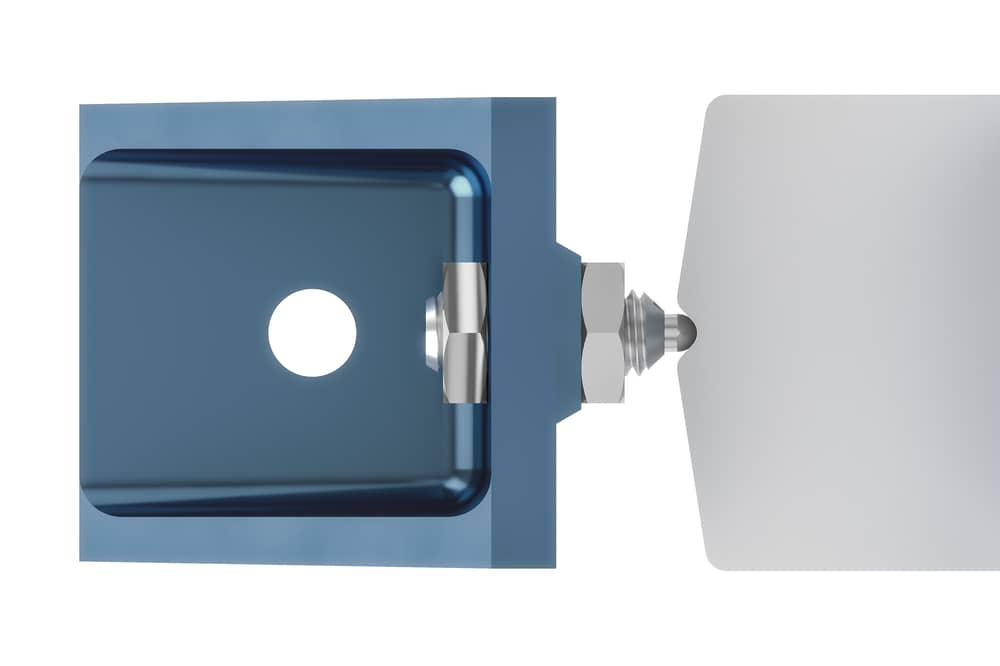
Correct depth: Contact between plunger and catch.

Incorrect depth: Gap between plunger and catch.
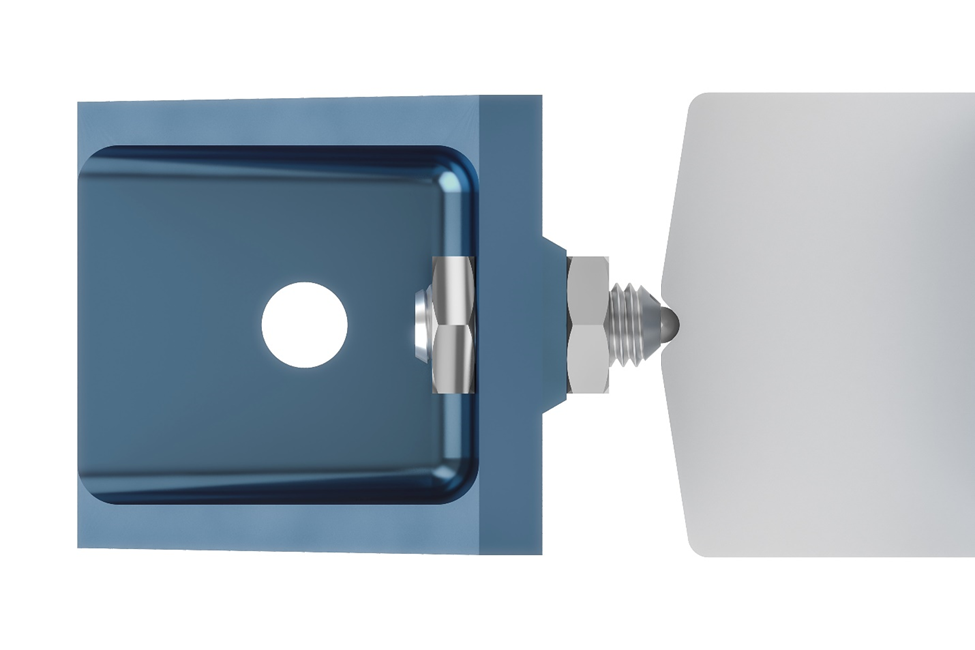
Incorrect depth: Plunger is too far towards catch.
After adjusting the depth of the spring plunger, adjust the spring force with a 2.5mm hex key if needed. The drawer should be able to lock and slide out without too much force.
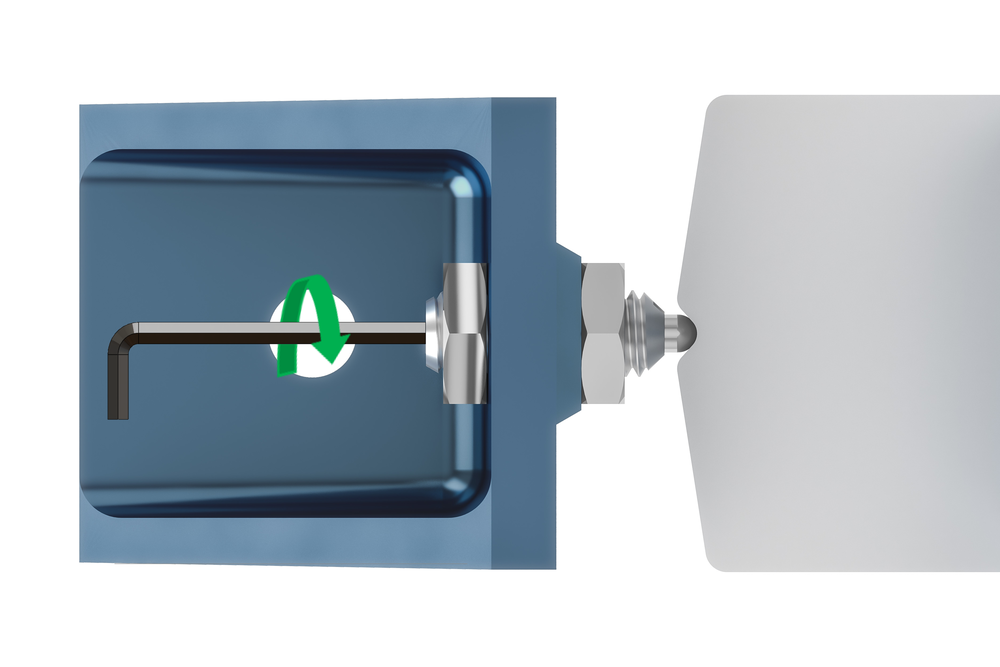
Plunger adjustment with 2.5mm hex key
Telescopic Slide Design Considerations
In order to ease alignment of slides after assembly, the design needs to allow for certain parts to float before being tightened in place. Slides need to be parallel, coplanar and correctly spaced. Each of these requirements applies to the frame side as well as the drawer side.
In general a design should allow the adjustment of the following issues:
Height of the slide relative to the frame.
Width of the drawer.
Rotation of the slide relative to the frame.
Rotation of the slide relative to the drawer.
Slides that are not parallel, in three axes.
Slides that are not coplanar.
Slides that are not correctly spaced.
Each of the issues above will happen during assembly due to differences in extrusion profiles, tolerances on extrusion cuts and assembly. Any of these issues can cause: binding, variable drawer opening force and lower drawer life.
The type of connector used in each joint on a machine tending cart should be carefully considered. Any joint that is used to align the slides should be GP (see step 7 of the assembly section). The reason is that these joints have an inherent amount of looseness allowing the assembler to tighten the joint in the correct location.
Assembly & Alignment Procedure
Step 1
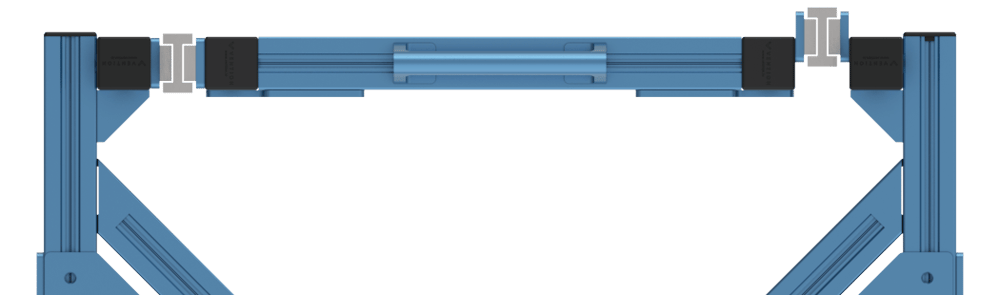
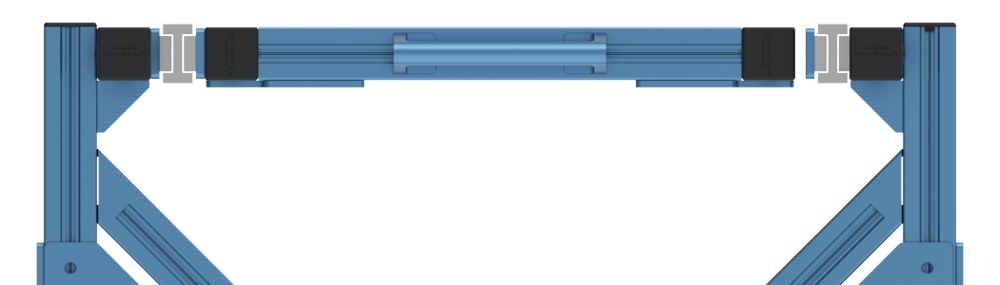
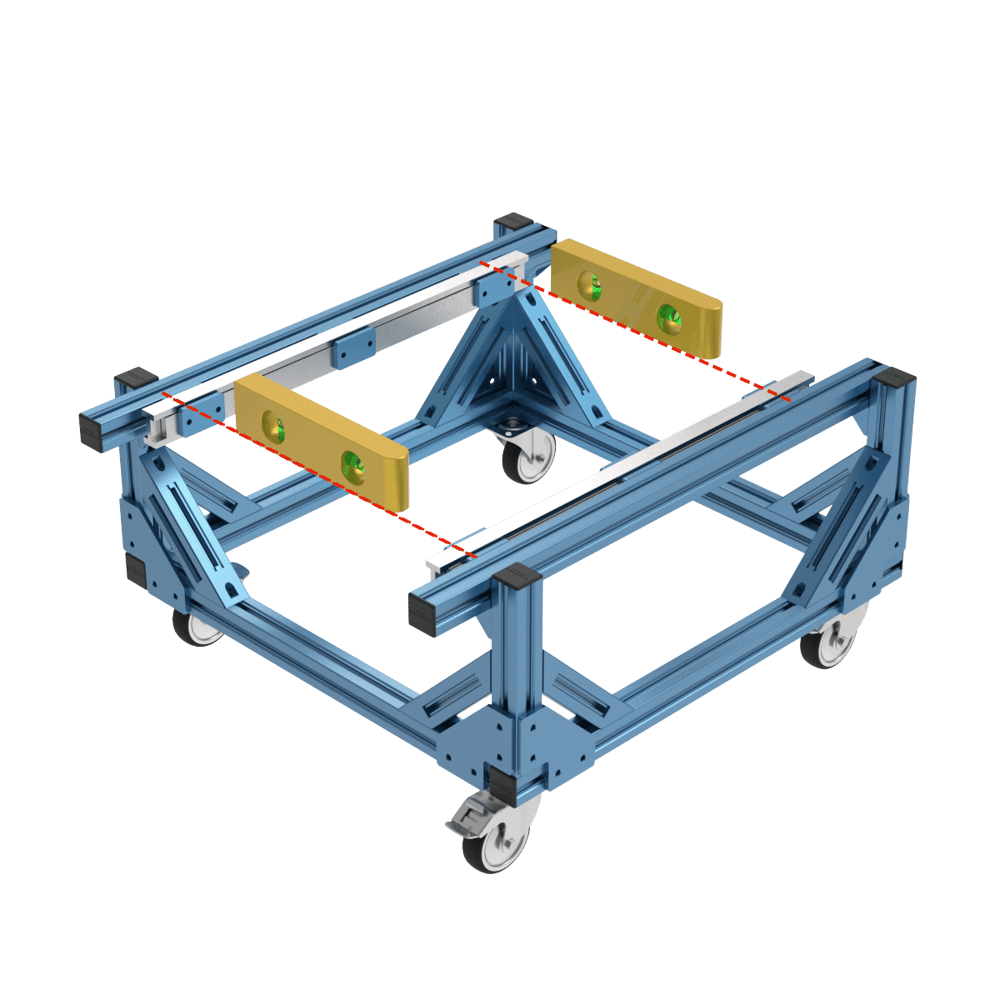
Starting with the bottom most drawer, assemble the horizontal extrusions that will support the slides. Note that the gussets that support the frame should be GP gussets which will allow slight misalignment to be fixed at a later step. Attach the slides to the extrusions:
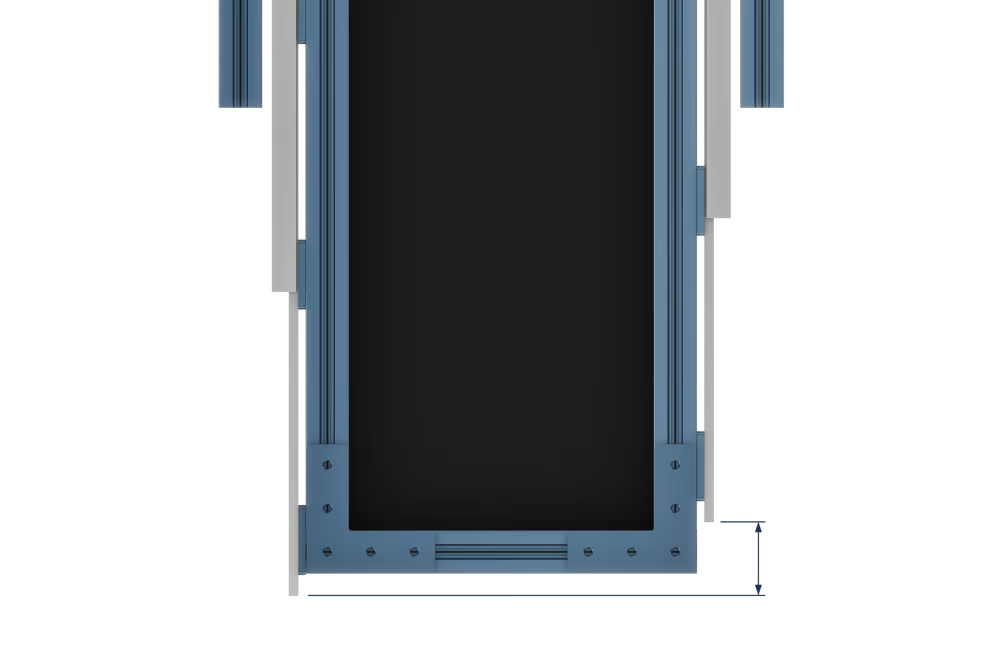 Distance should be within 1mm. |
Check the distance of both slides from the end of the frame and adjust so they match. This will ensure that the drawer will be straight in the open position,
Step 2
Using a level, ensure that the four corners of the frame are vertical. This can be adjusted by loosening the gussets at the bottom of the frame and adjusting the leveling feet. Depending on the exact design you may need to loosen other parts of the frame.
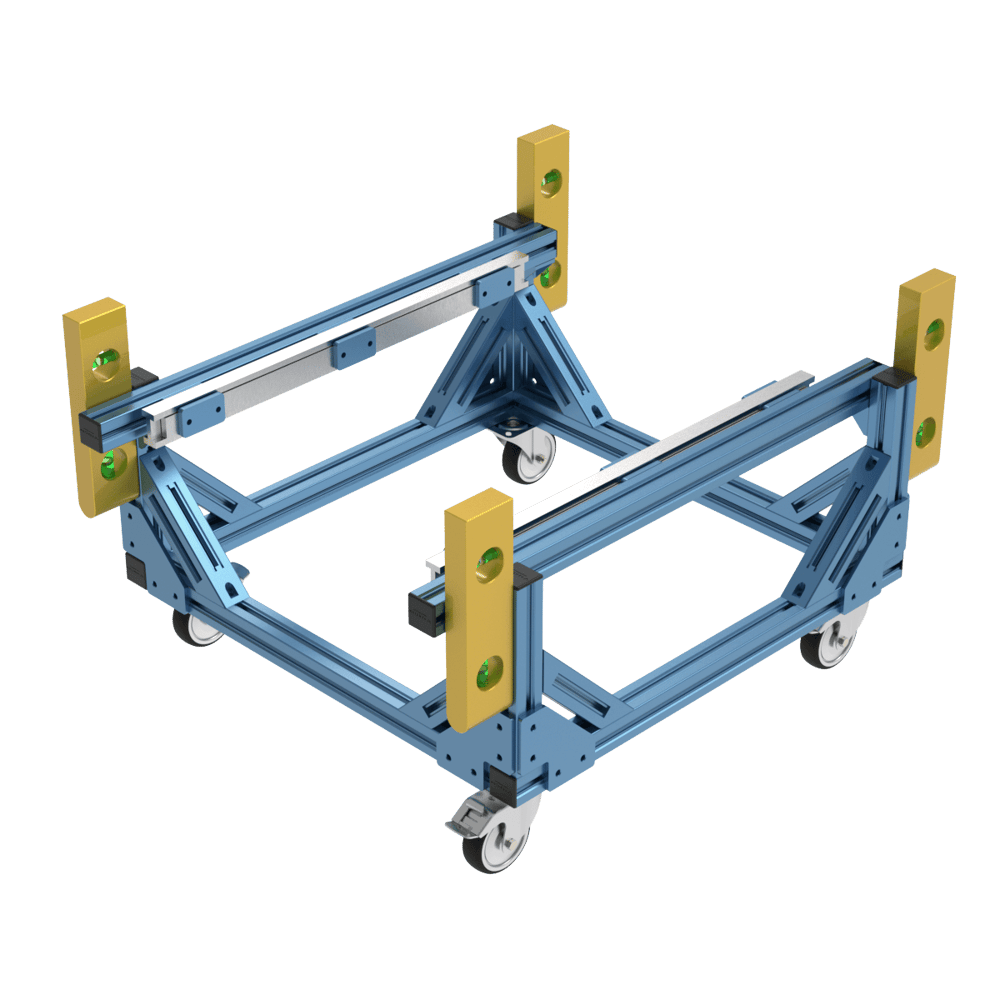 Ensure posts are vertical. |
Step 3
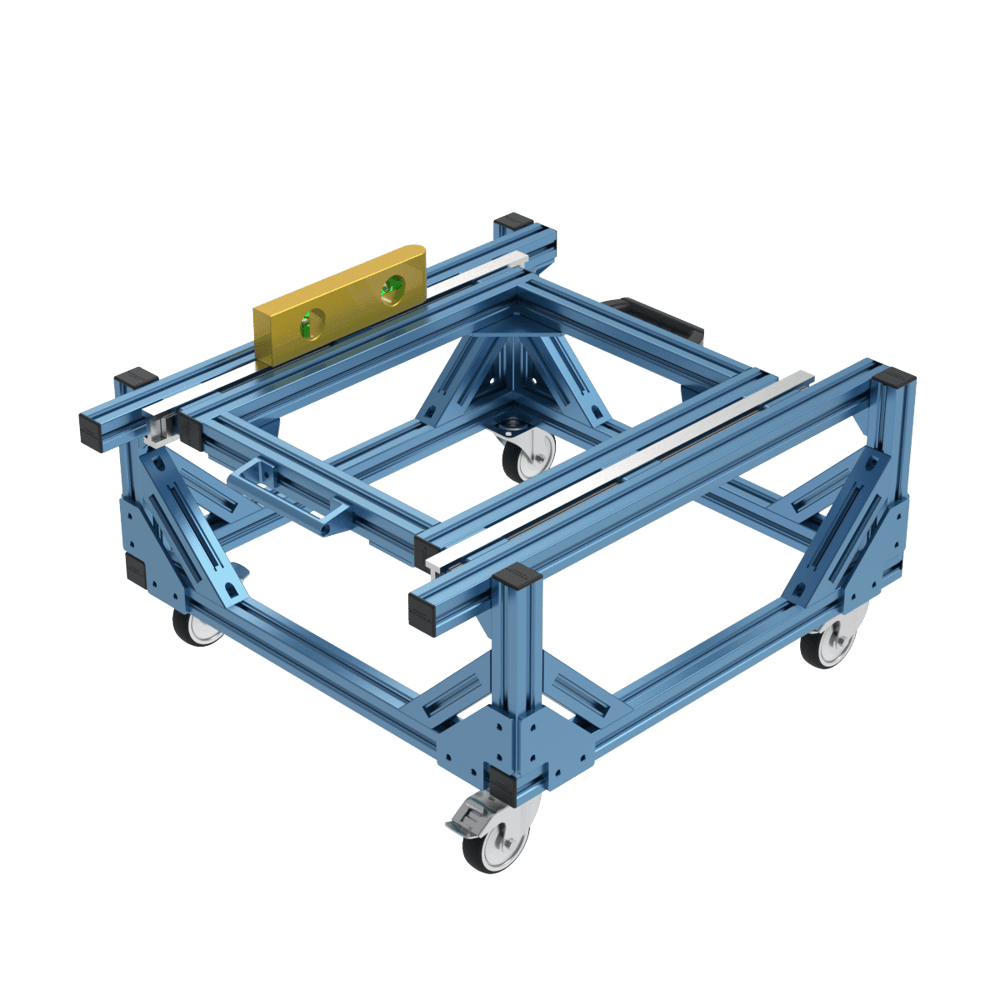
Level the first slide with a level.
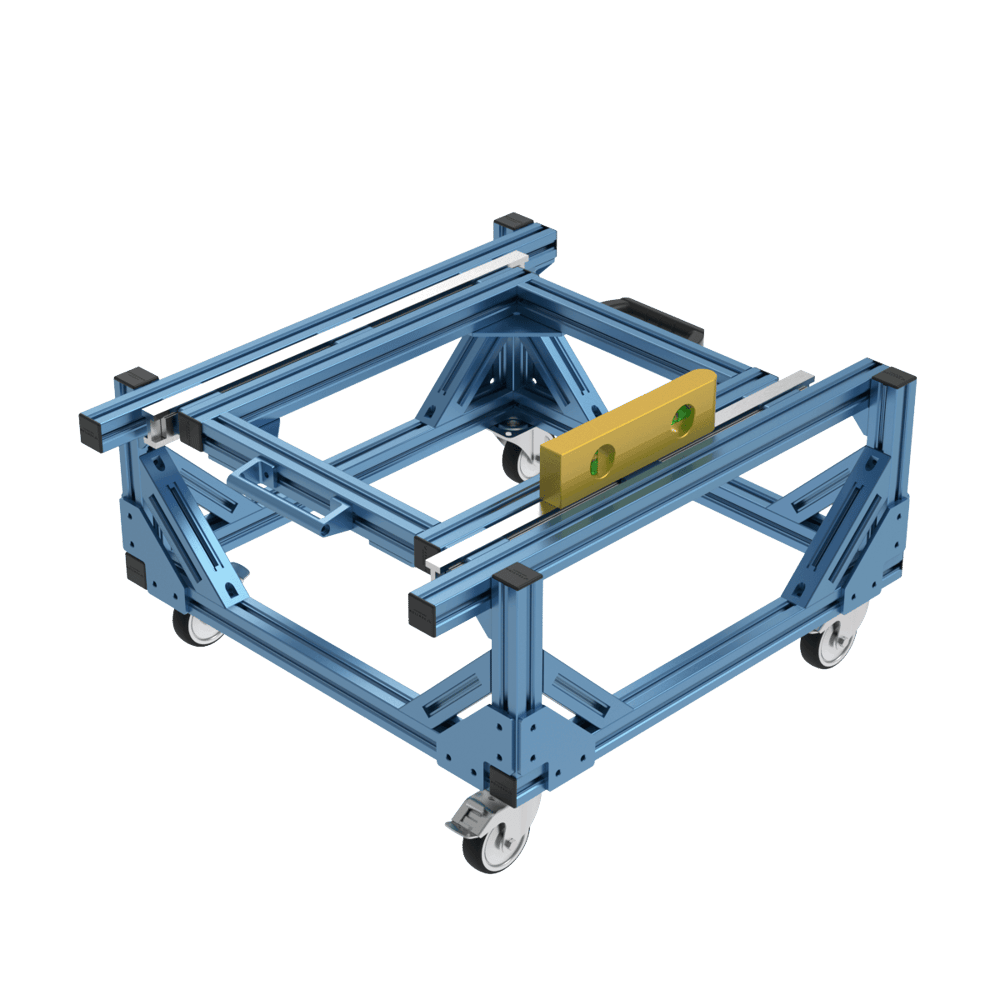 Level slide. |
Step 4
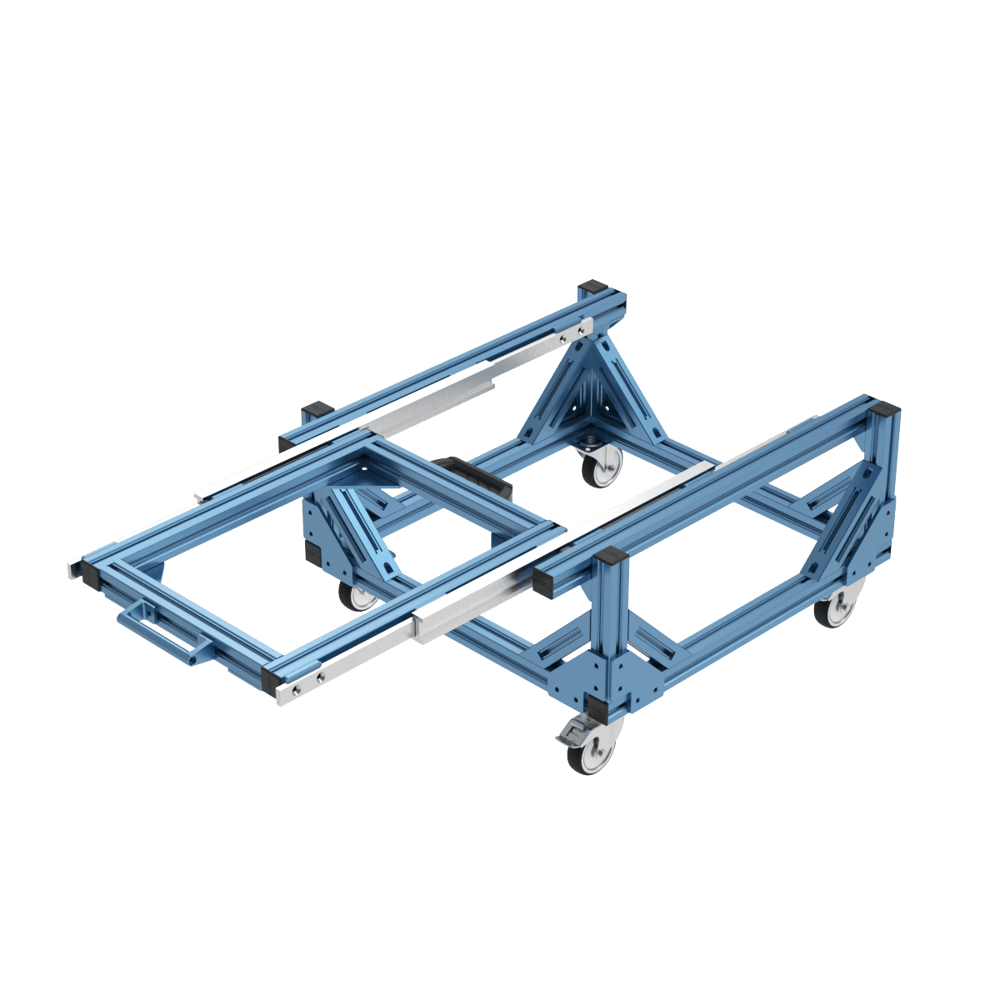
Level the second slide and extrusion by placing the level from the first slide to the second. This step ensures that they are planar. If the level isn’t long enough, you can use any straight edge, ex: extrusion to level it. Leveling from slide to slide is best practice as it ensures that the telescopic slides are aligned.
 Ensure co-planarity of slides. |
Step 5
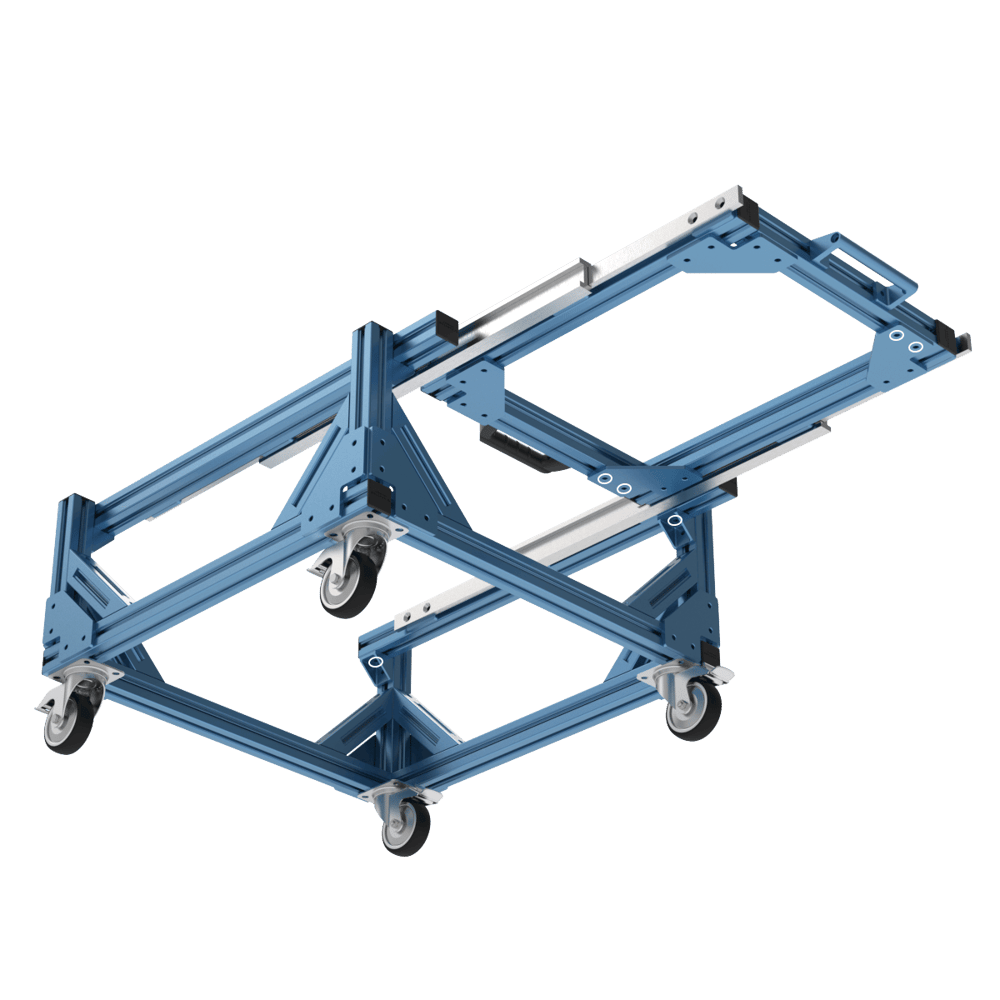
Verify level of second slide and extrusion. If the previous steps are done correctly, this one should be level without adjustment. If it is off, then the previous steps need to be checked and re-done if not level.
 Check second slide to ensure level. |
Step 6
Assemble the drawer frame.
 Assemble the drawer frame with trays or without. |
Step 7
Loosen the bolt on one side as shown so that they can slide along the t-slots. If there is a panel installed on the drawer, loosen all of its bolts. This will allow the drawer to find its width.
 Loosen bolts here |
Step 8
Cycle the drawer backwards and forwards so that the telescopic slides can align themselves. Then re-tighten all of the bolts loosened in step 7.
Step 9
Check that the drawer feels smooth and isn’t difficult to slide at any point in its stroke. Pay special attention to the ends of the stroke. Return to step 7 if there are issues.
Step 10
Repeat the steps for each of the following drawers and add any accessories.
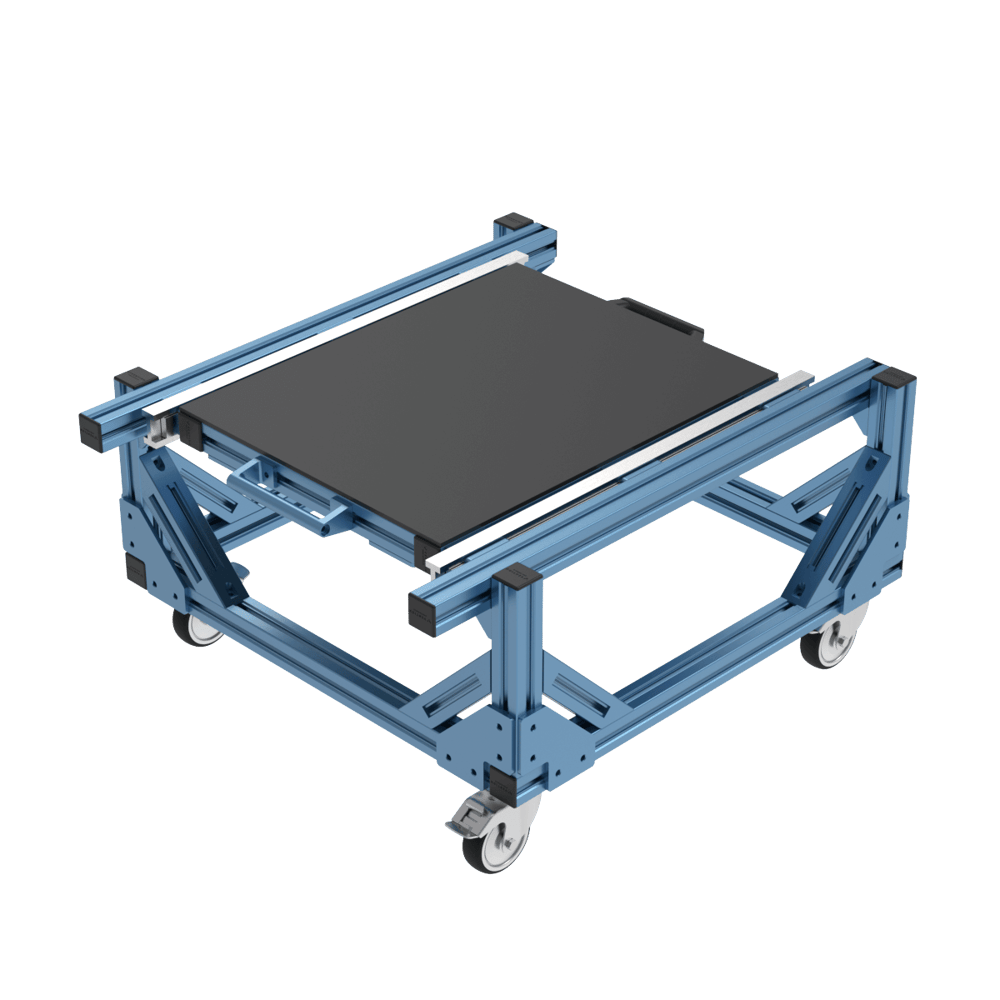 Completed cart |
Step 11
If re-greasing is required, you can wipe off the old oil/grease as best as possible and then apply Ventions standard grease.
Maintenance
Telescopic slides need to be periodically re-greased to preserve performance. Start by removing old grease with rag. Apply new grease by opening the drawer and applying grease to the track on both the top and bottom. Cycle the drawer multiple times and then clean excess grease with a rag. Vention standard grease can be used, otherwise light or medium grease can be used. It is suggested to clean thoroughly the slide before changing the grease types.
Problems and solutions
Problem: A small amount of play or looseness can be detected when at an indexing position.
Solution: Check that the fasteners are tight on the catch and spring plunger. Adjust the spring plunger so it is closer to the catch.
Problem: Drawers are hard to move, make a scraping noise when moved, and/or require high force to move past the indexing position.
Solution: Adjust the spring plunger so it is further away from the catch.
Problem: Drawer is hard to open or close, or has tight spots in its travel.
Solution: Note the location of the tight spot. Cycle the drawer through its full travel distance, paying attention to any tight spots. Tight spots occur when the drawer and frame are not parallel. To fix them, loosen either the drawer or the frame, and then re-tighten it when the drawer is in the position that was causing issues. The drawer is typically much easier to loosen, so start with it first. Repeating the loosen-cycle-tighten a few times is usually enough to ensure the drawer operates smoothly.
Problem: Drawer does not open to its full specified length.
Solution: This is usually the result of misaligned telescopic slides. Use a straight edge, extrusion, or other measuring device to align the telescopic rails on both the frame and drawer. Refer back to step one of the installation procedure.