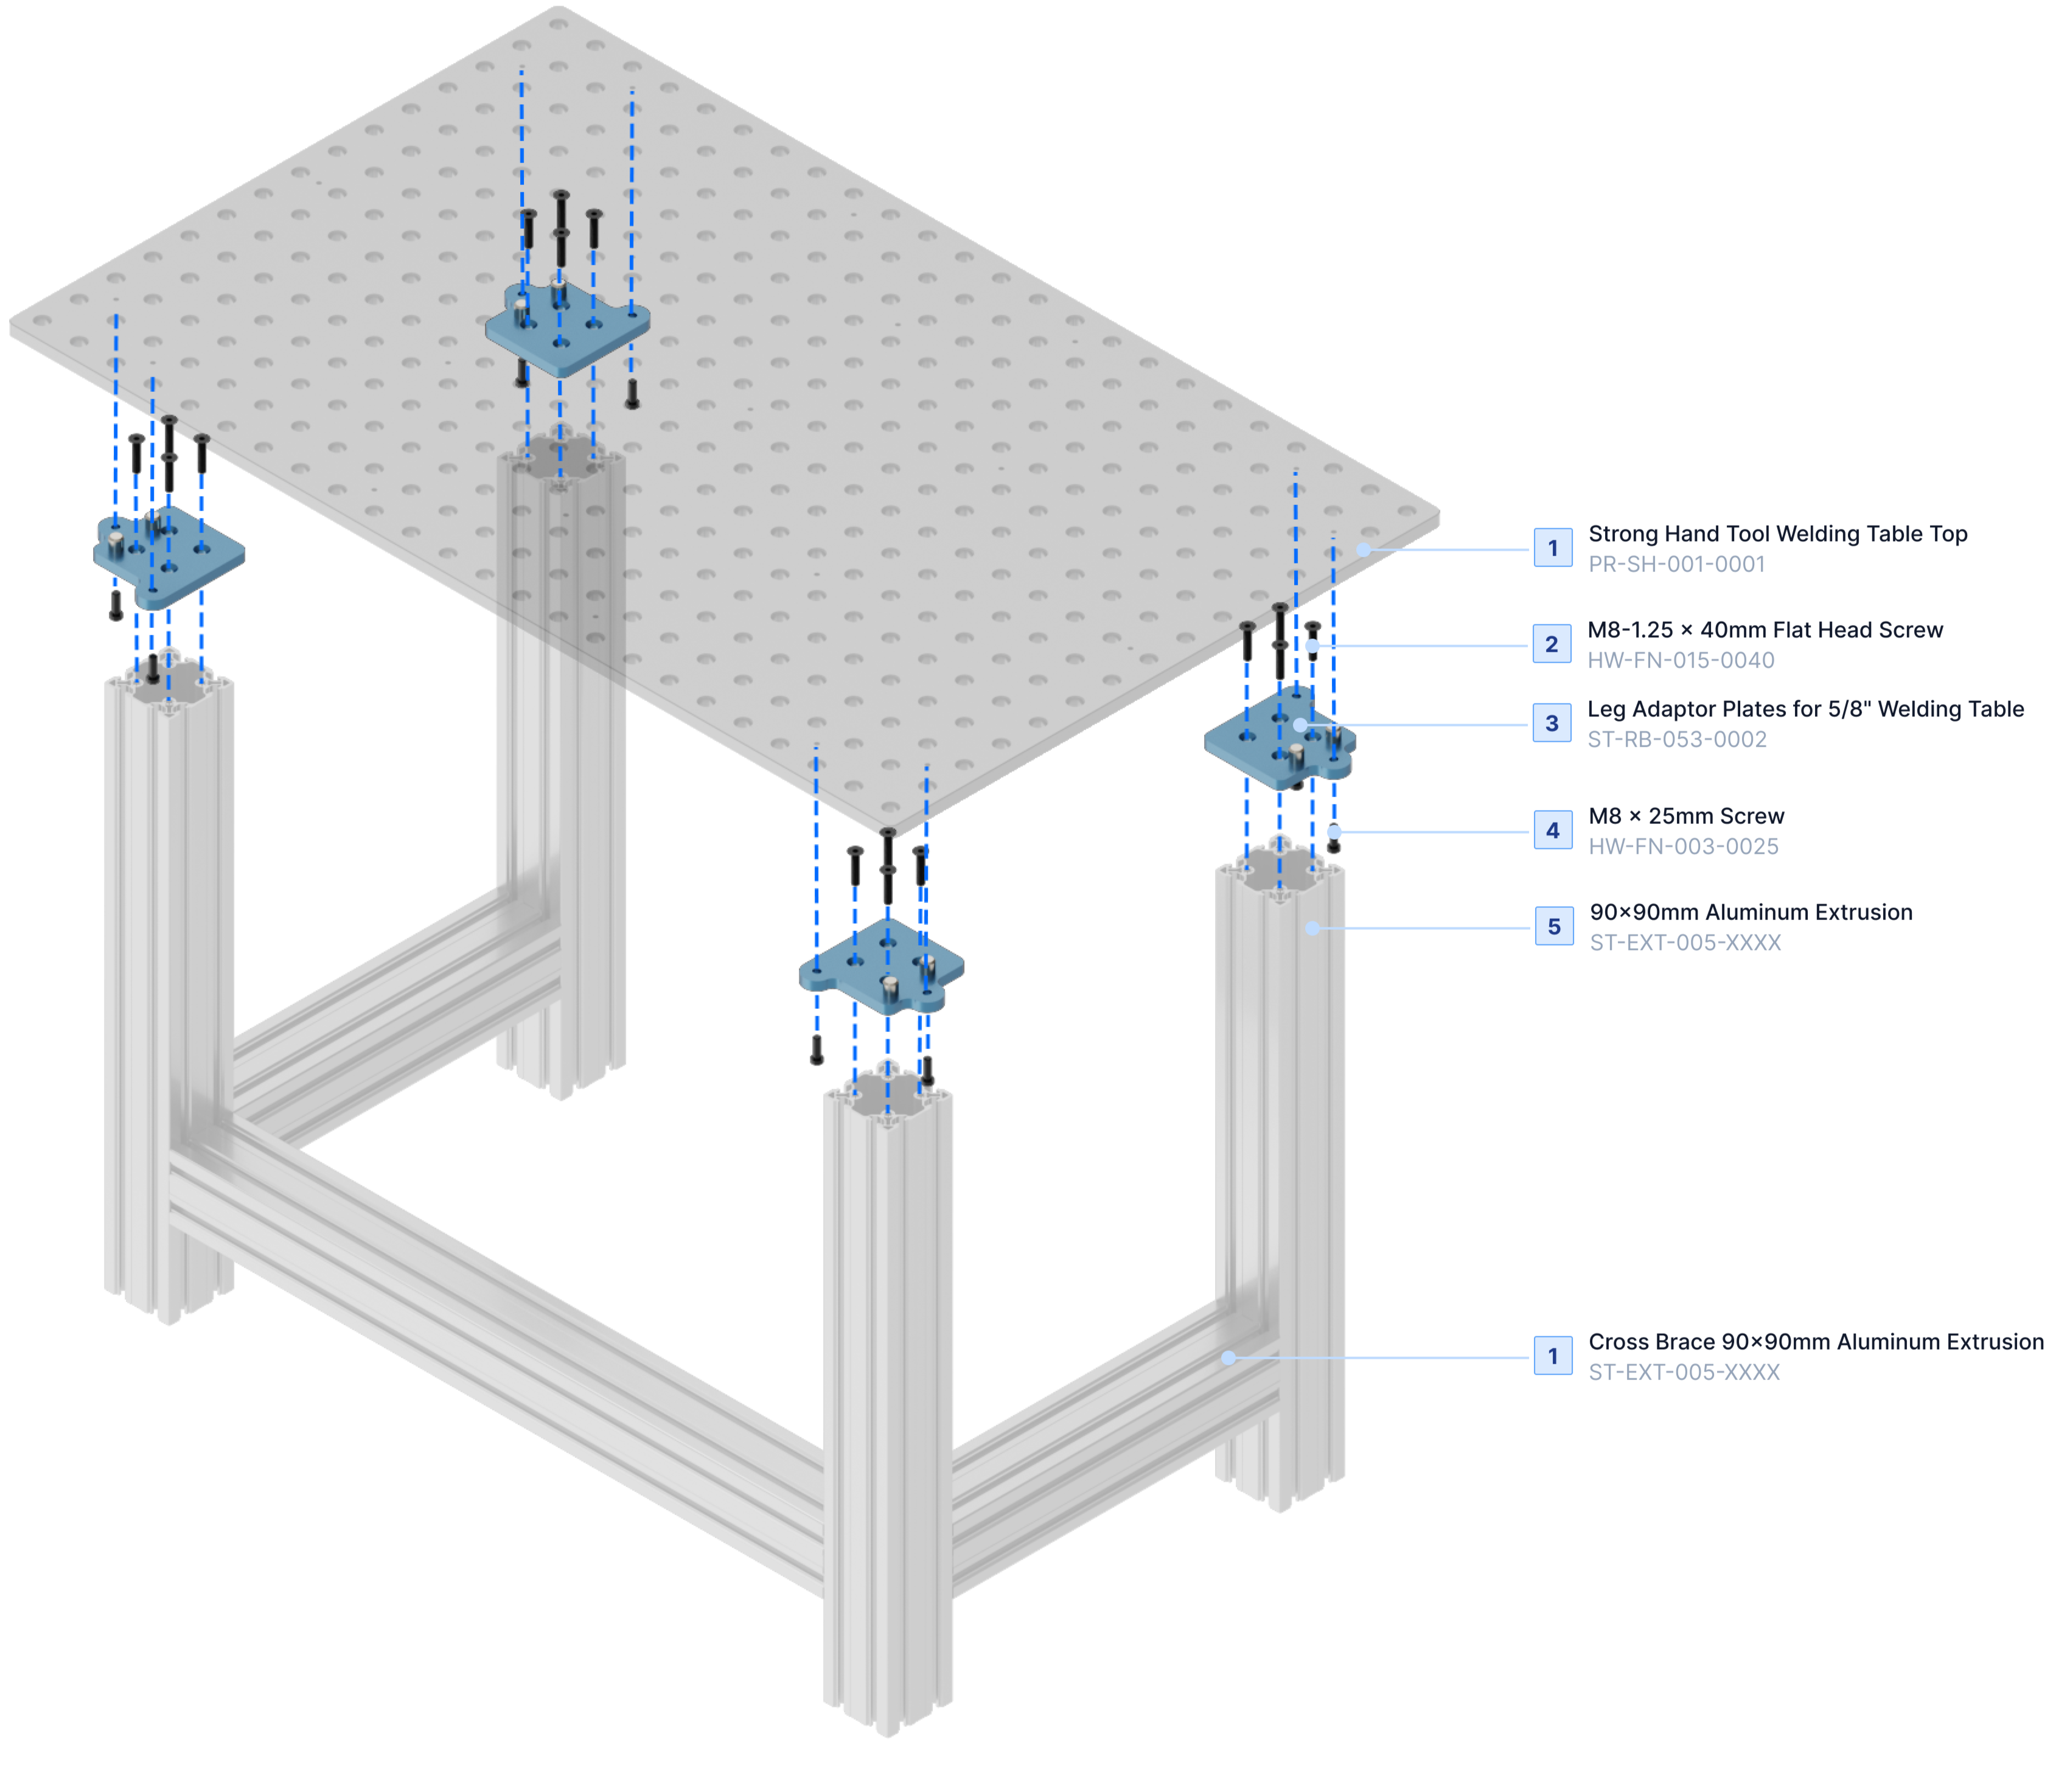
This guide details the correct procedure to assemble leg adapters to mount aluminum extrusions onto the welding table. Following these assembly steps will prevent common assembly issues and guarantees a secure result on the first try.
Supported Configurations:

Step 1:
Attach the leg adaptors to the extrusions to create a sub-assembly.

Step 2:
Position the sub-assembly on the welding table and secure it to the tabletop using M8 screws.
.jpg)
Step 3:
Install extrusion cross braces extrusions if your design has them.
Compatible but Not Recommended Configuration:
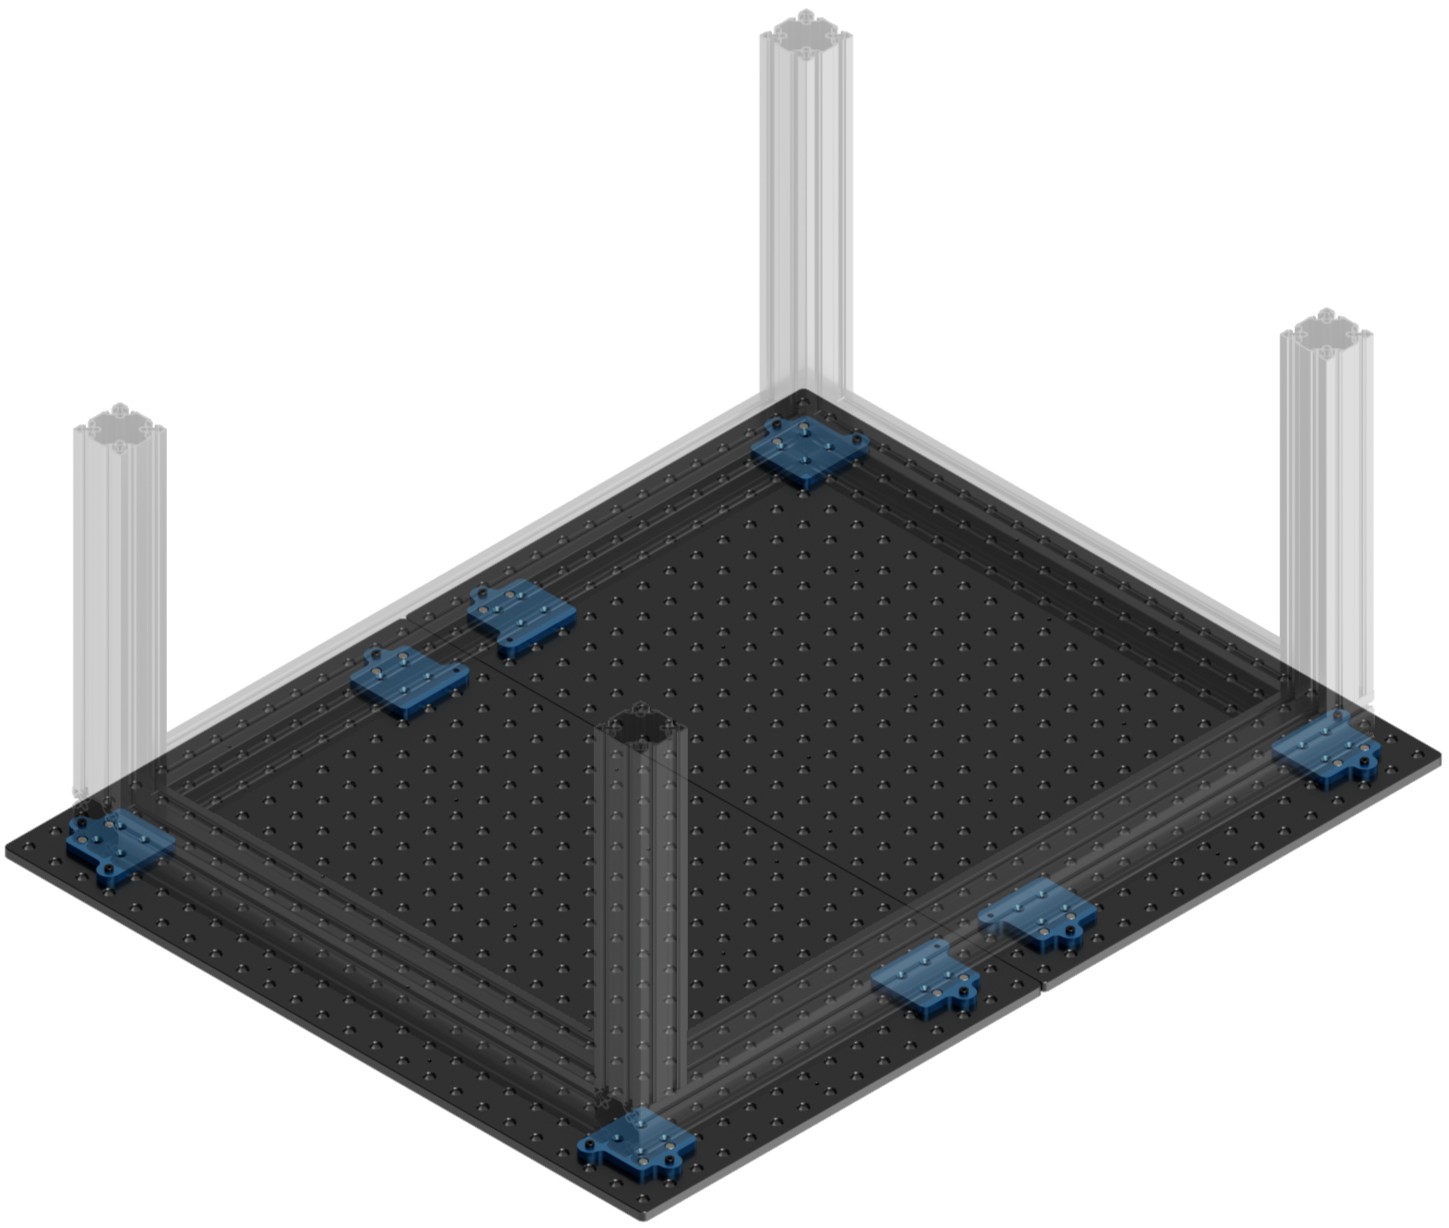
When combining multiple welding tables, avoid spanning a single extrusion across the seam between them. Doing so complicates the assembly. Refer to the following examples and assembly steps for guidance.
Step 1:
Attach the leg adaptors to the extrusions. Only tighten those that have screws that thread into the end of extrusions. Those that go into the t-slots should be left loose. Use measurements from machine builder to place those adapter in the right place.
Step 2:
Lower the table slowly and adjust the position of the leg adaptors to align with the table if necessary.
Step 3:
Lift the table up. Move it up slowly and make sure not to move the leg adaptors.
Step 4:
Tighten the leg adaptors to the extrusion that you left loose in step #1.
Step 5:
Lower the table back again on the leg adaptors and tighten the accessible M8 screw to the welding table.