Overview
Welcome to the MachineMotion AI integration guide for Universal Robots! This guide walks you through the setup process to connect, control and create MachineLogic application with your UR e-Series Robot!
Compatibility Notice
This user guide is compatible for MachineMotion AI only. To access the guide for the previous MachineMotion v2, follow the following link: MachineMotion v2 - Configuration Guide
1. System Requirements
To program a UR e-Series Robot with MachineMotion AI, ensure you have the following components:
✅ MachineMotion AI Controller
✅ Pendant V3
✅ Robot Safety Module
✅ E-Stop Module with Reset
✅ UR e-Series Robot with controller
✅ Safety Extension Cables
✅ URCap Software from Vention (via USB or download)
Note: This list depicts the minimum set of components needed to configure and control your UR e-Series robot with MachineMotion AI.
Your system may have a different set of components according to your safety needs.
2. Hardware Setup
2.1 Components Connection
Connect the Robot Safety Module to the MachineMotion AI controller, pendant, and robot controller (As shown in Figure 1).
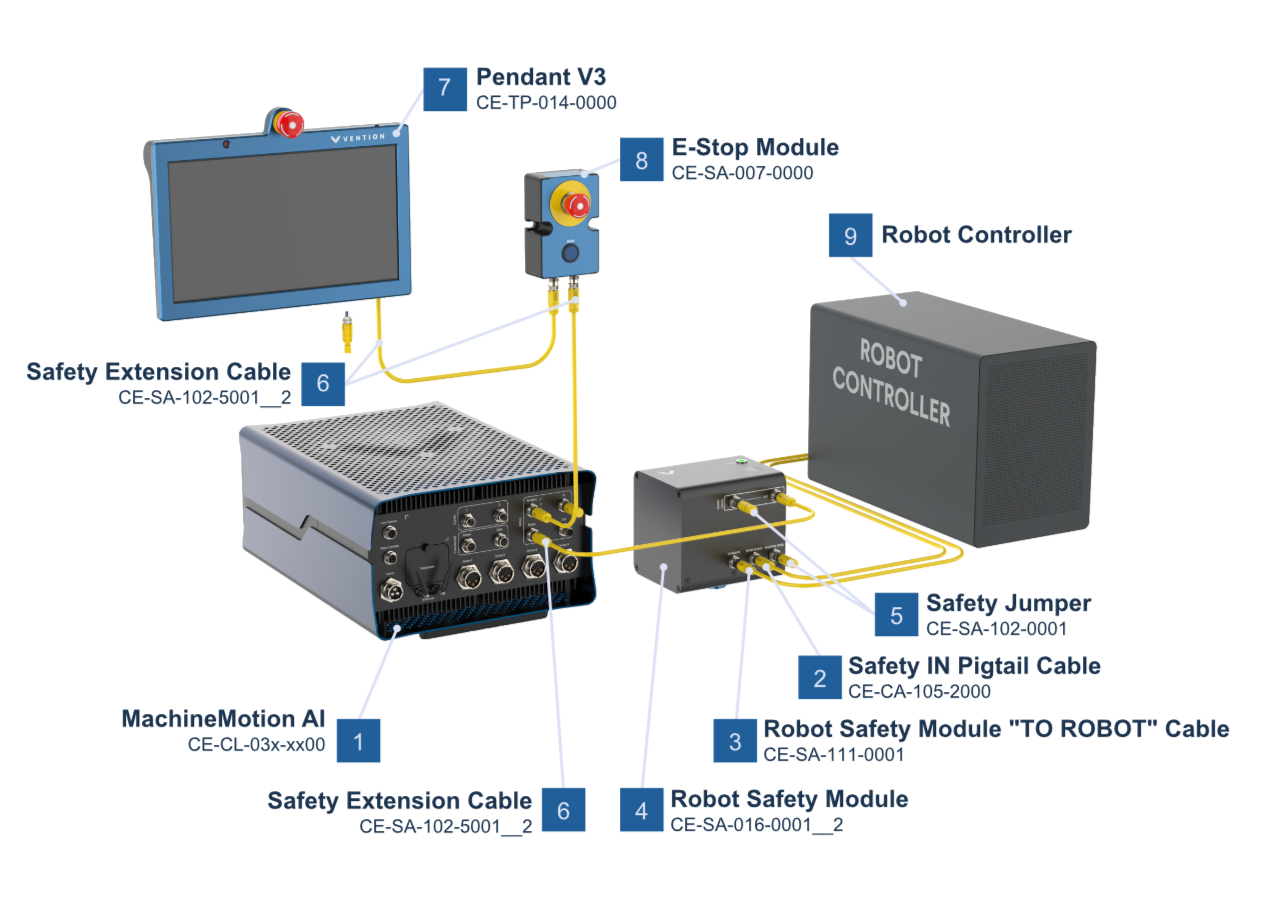
Figure 1: Connection Diagram for MachineMotion AI with Robot Safety Module
Ensure all safety devices are wired properly and the controller safety wiring is done as per following diagram
Power on all devices.
2.2 Robot Controller Safety Configuration
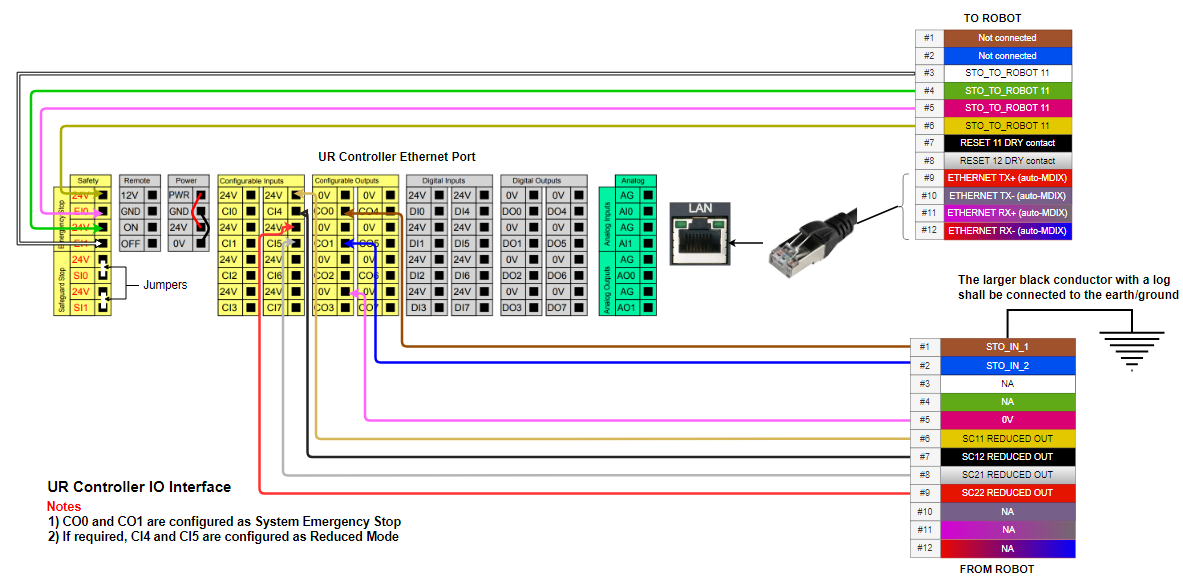
The input & output pins on the Universal Robots controller can be configured as safety pins using the UR Teach Pendant.
Navigate to:
Installation > Safety > I/O(If needed) Assign to config_in[0], config_in[1] : Reduced Mode
Assign to config_out[0], config_out[1] : System Emergency Stopped
Settings Lock by safety password
If the safety settings are locked by a safety password, simply input your safety password then unlock.
By default, Universal Robots safety password is: easybot
.png)
Universal Robot Safety I/O Configuration
3. Configure the UR Controller Network
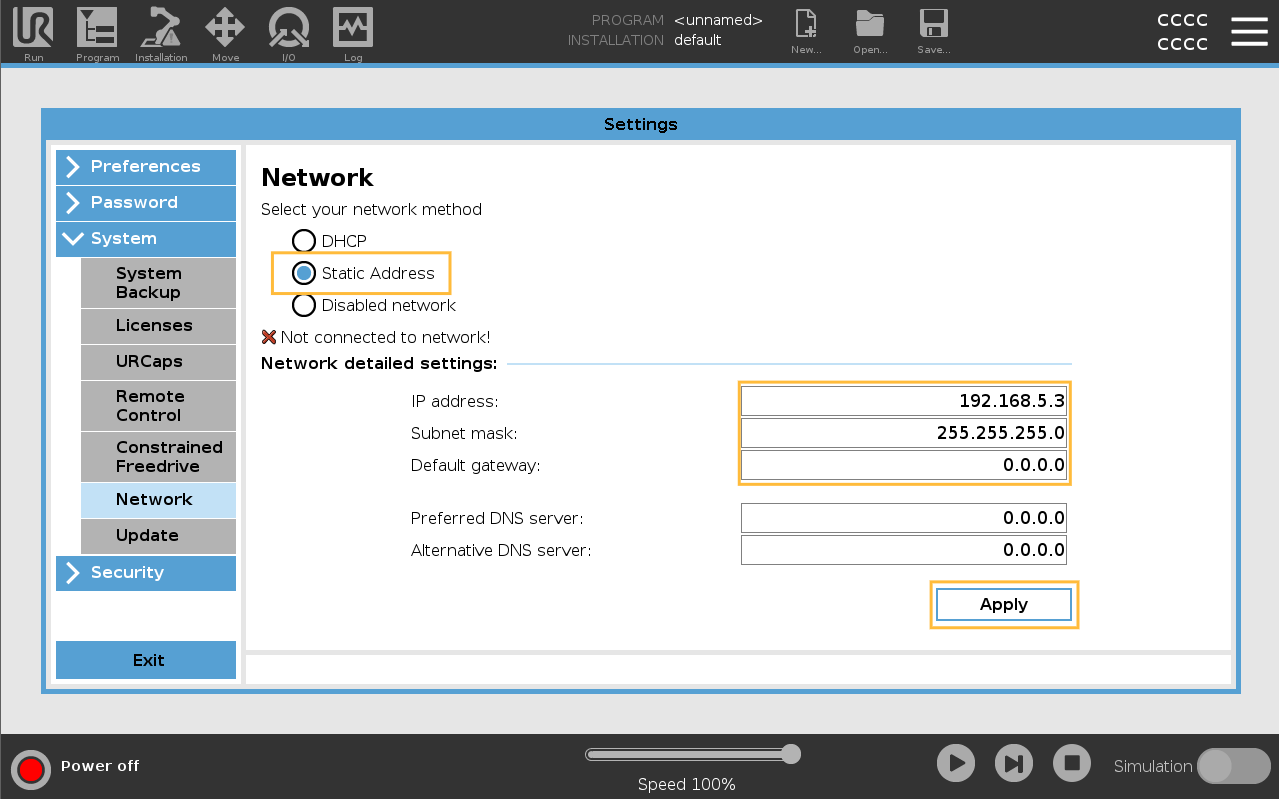
3.1 Set a Static IP
On the UR Teach Pendant:
Go to:
Menu > Settings > System > NetworkSet to Static Address
Use the following values:
IP Address:
192.168.5.3Subnet Mask:
255.255.255.0Default Gateway:
0.0.0.0DNS Servers:
0.0.0.0
Click Apply.
3.2 Security Settings
To ensure the connection between the MachineMotion and the Universal Robot can be established properly, validate that the following settings match the following parameters.
Go to: Menu > Settings
Security → General Settings
.png)
Security → Secure Shell Settings
.png)
Security → Services Settings
.png)
4. Install and Configure the URCap
4.1 Install Vention’s URCap
Insert the USB key with the URCap into the teach pendant.
You can also download the URCap manually with the following link:
Go to:
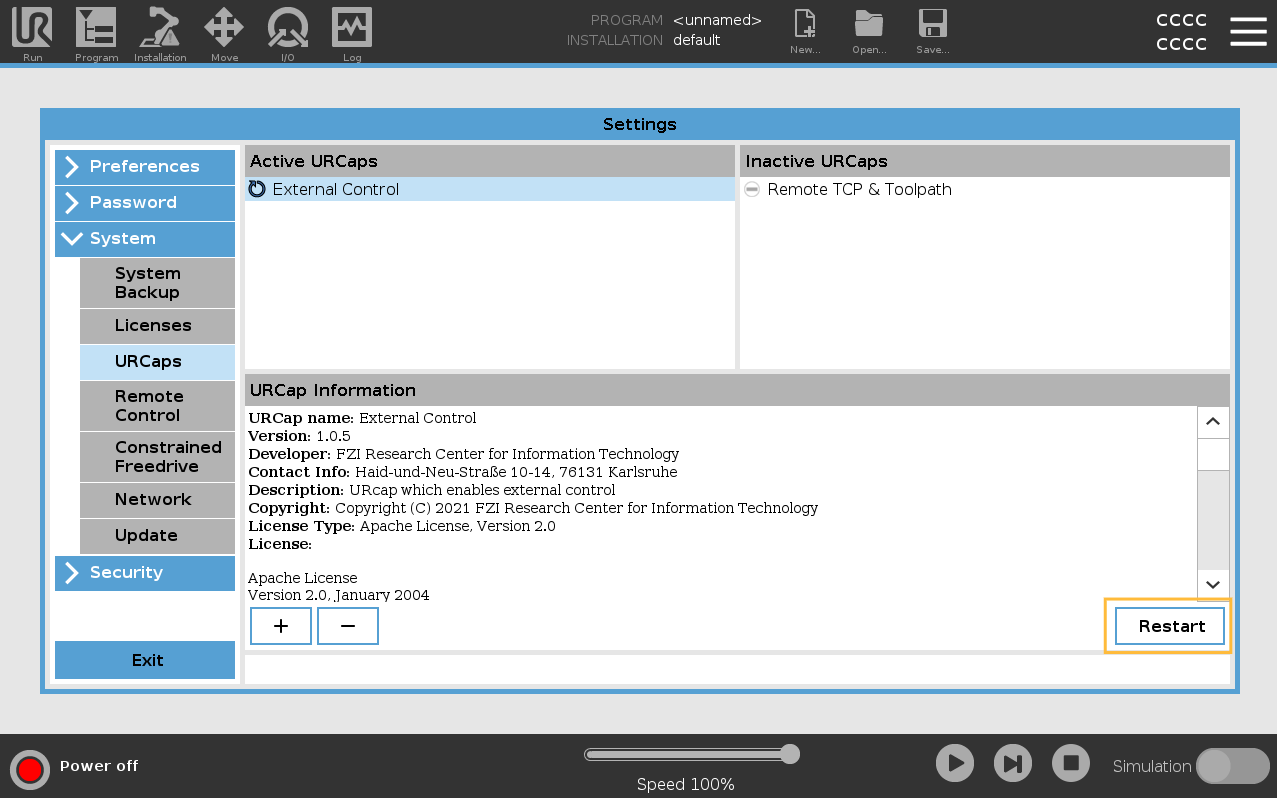
Menu > Settings > System > URCapsTap
+, select the.urcapfile, and tapOpen.Restart the robot controller when prompted.
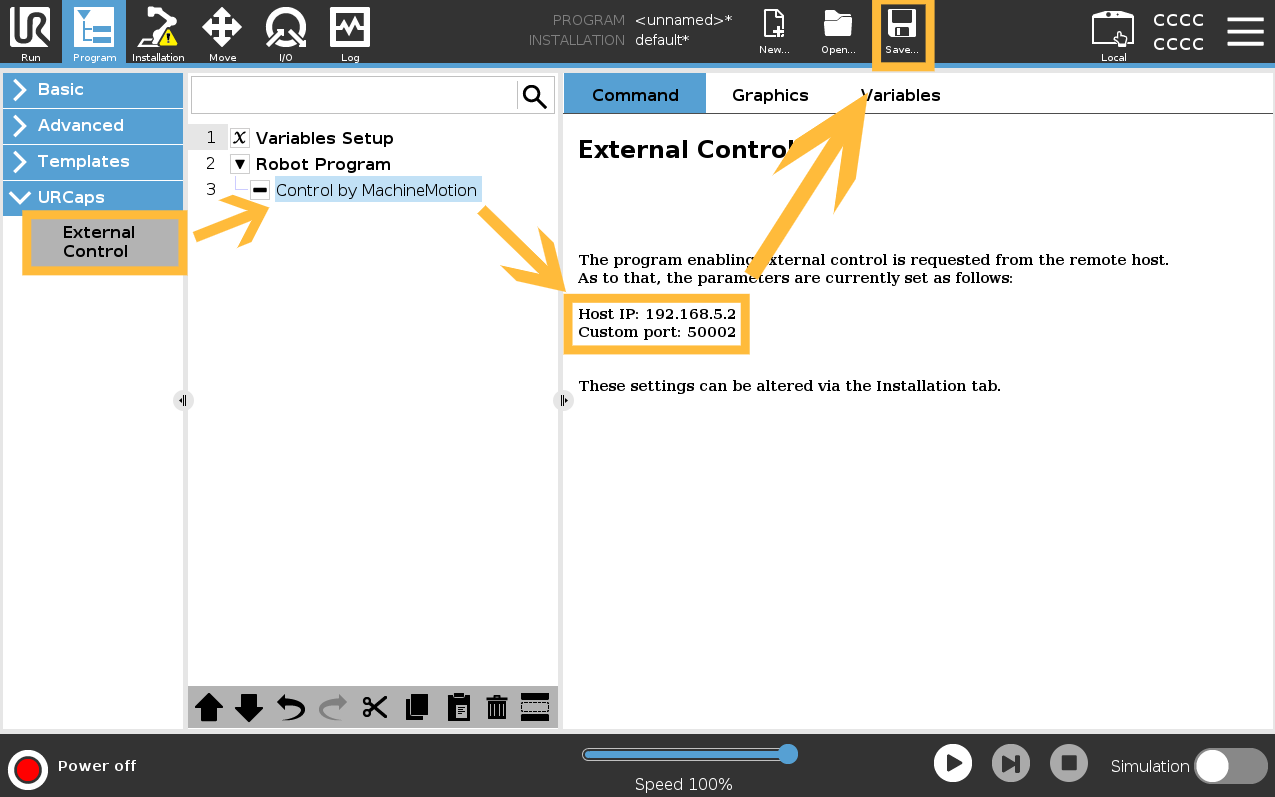
4.2 Configure the URCap
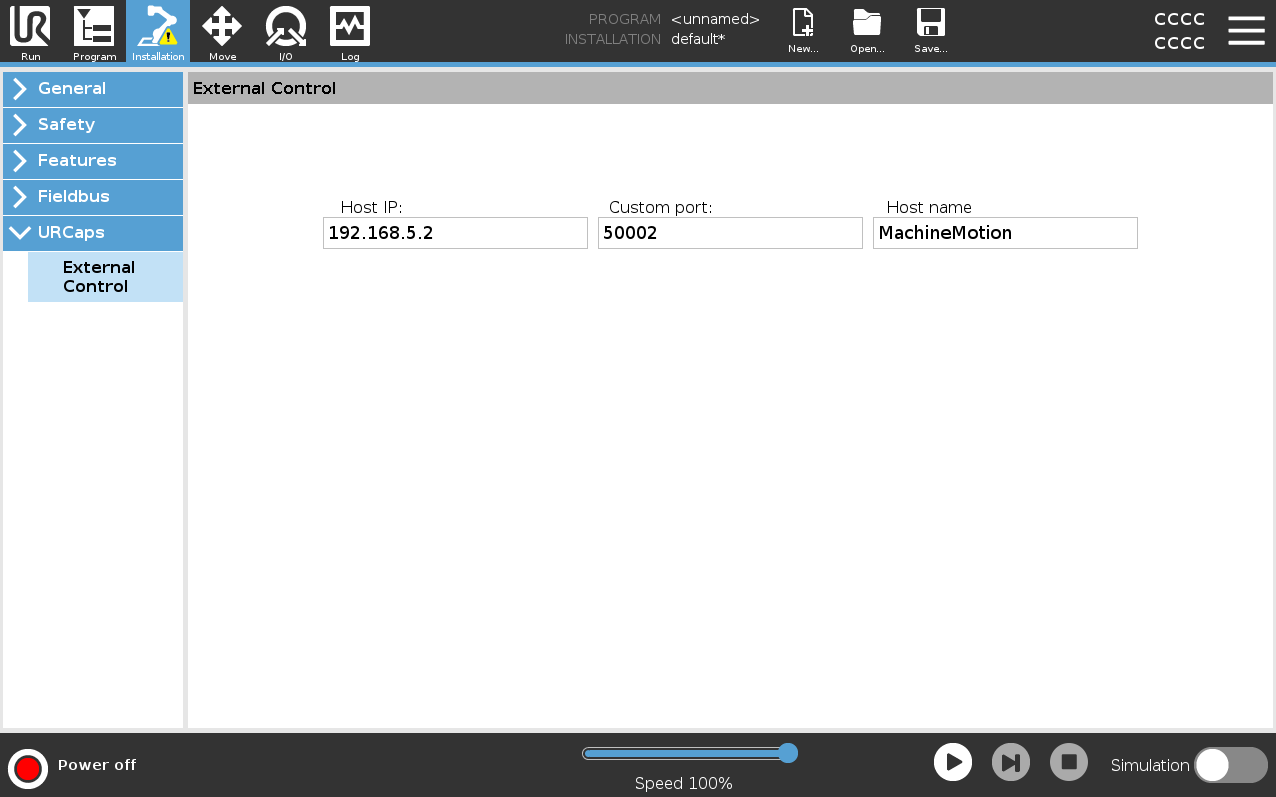
Go to:
Installation > URCaps > External ControlDefine the following IP and Port address according to the MachineMotion you have:
MachineMotion AI
Host IP:
192.168.5.2Custom Port:
50002
MachineMotion v2
Host IP:
192.168.5.1Custom Port:
50002

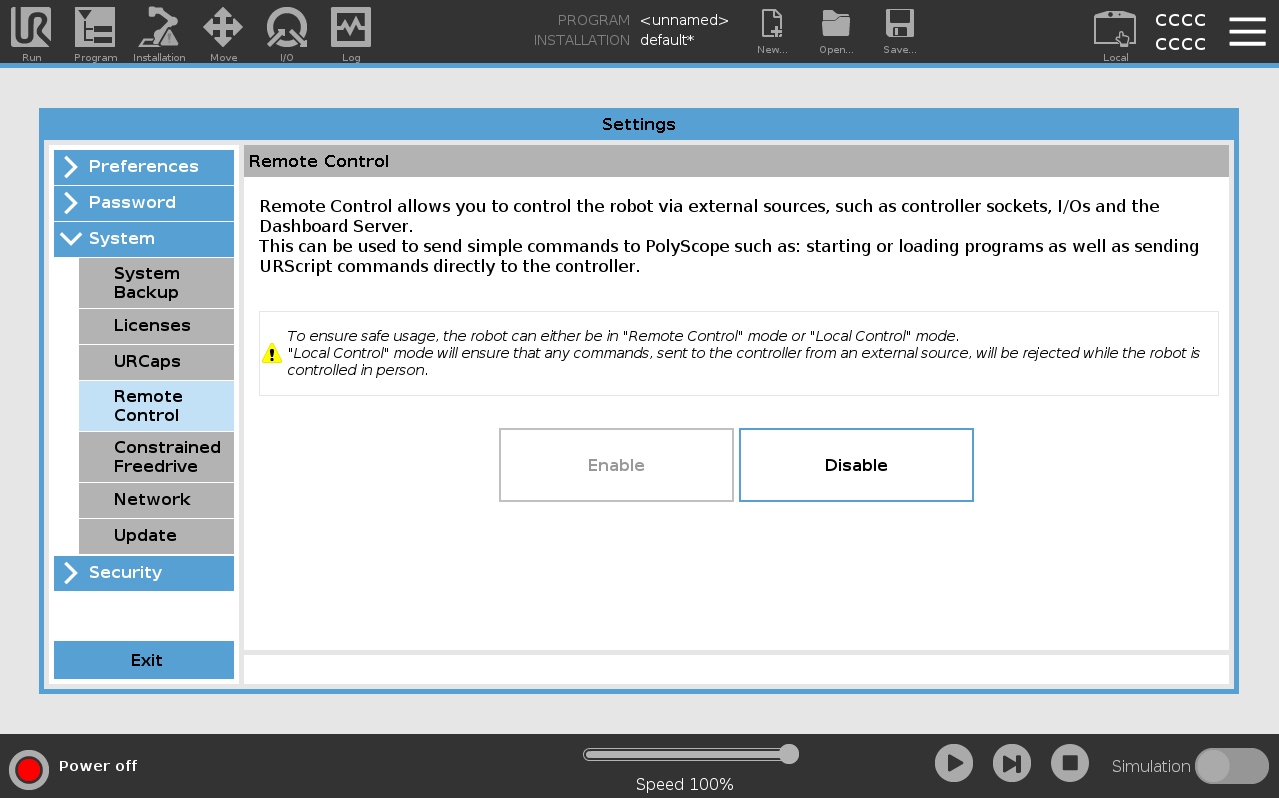
4.3 Enable Remote Control
Navigate to:
Menu > Settings > System > Remote ControlClick Enable
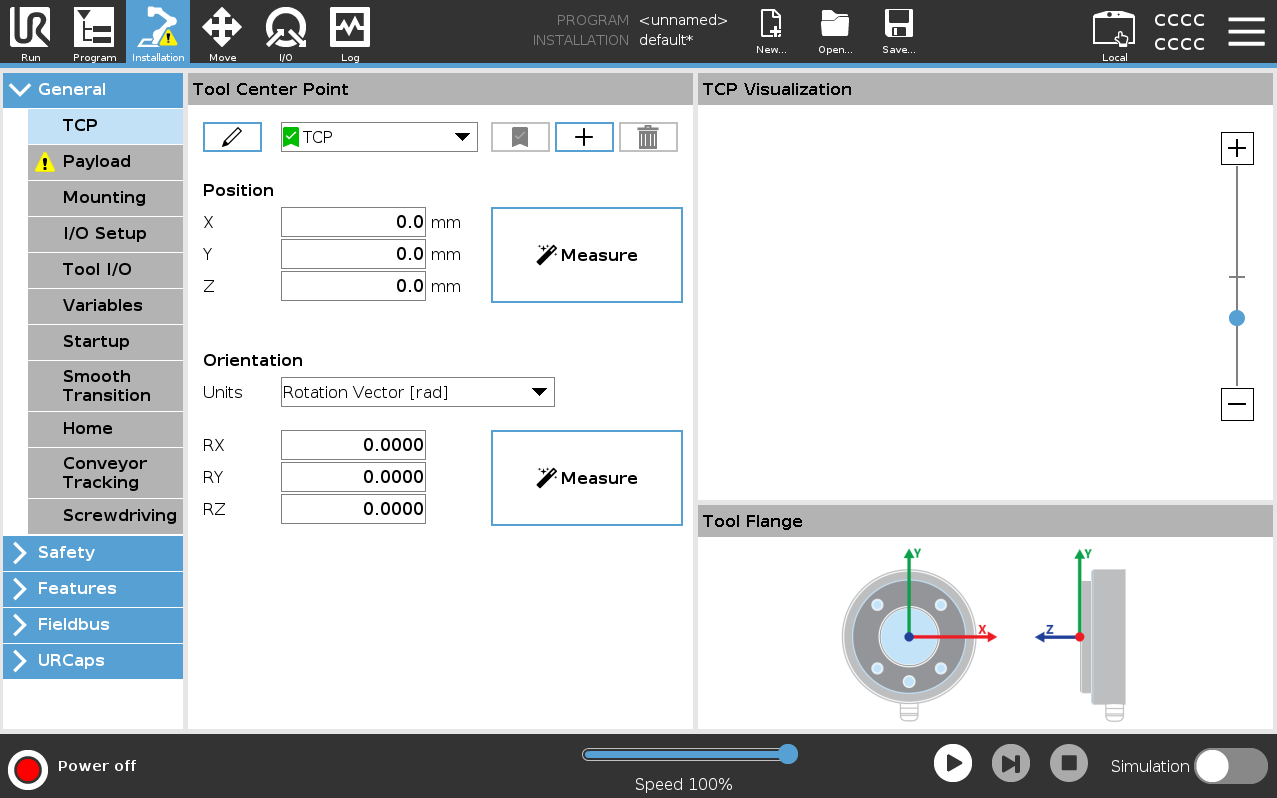
4.4 Zero the TCP (Tool Center Point)
Go to:
Installation > General > TCPSet all TCP values to 0 (X, Y, Z, RX, RY, RZ)
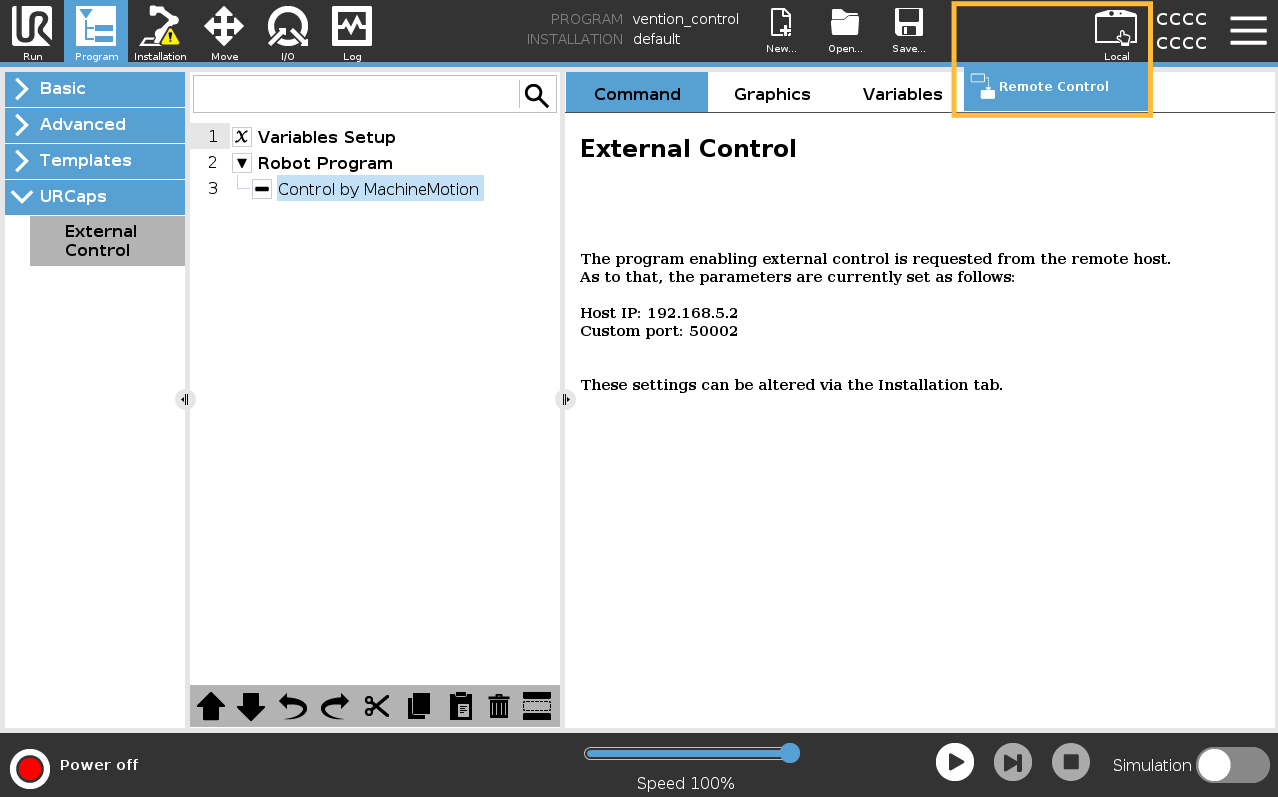
4.5 Create and Save a UR Program
Create a new program:
New > ProgramFrom the tree view:
URCaps > External ControlValidate the Host IP and Port are the correct one according to your MachineMotion (ensure they match step 4.2)
Save..
Select Save All, this will ensure the installation and program are saved together.
The program must be named with this exact name:
vention_control.urp
Important: This name must be exact for MachineMotion AI to recognize the UR program.
4.6 Switch to Remote Control Mode
On the top bar, switch from Local to Remote Control
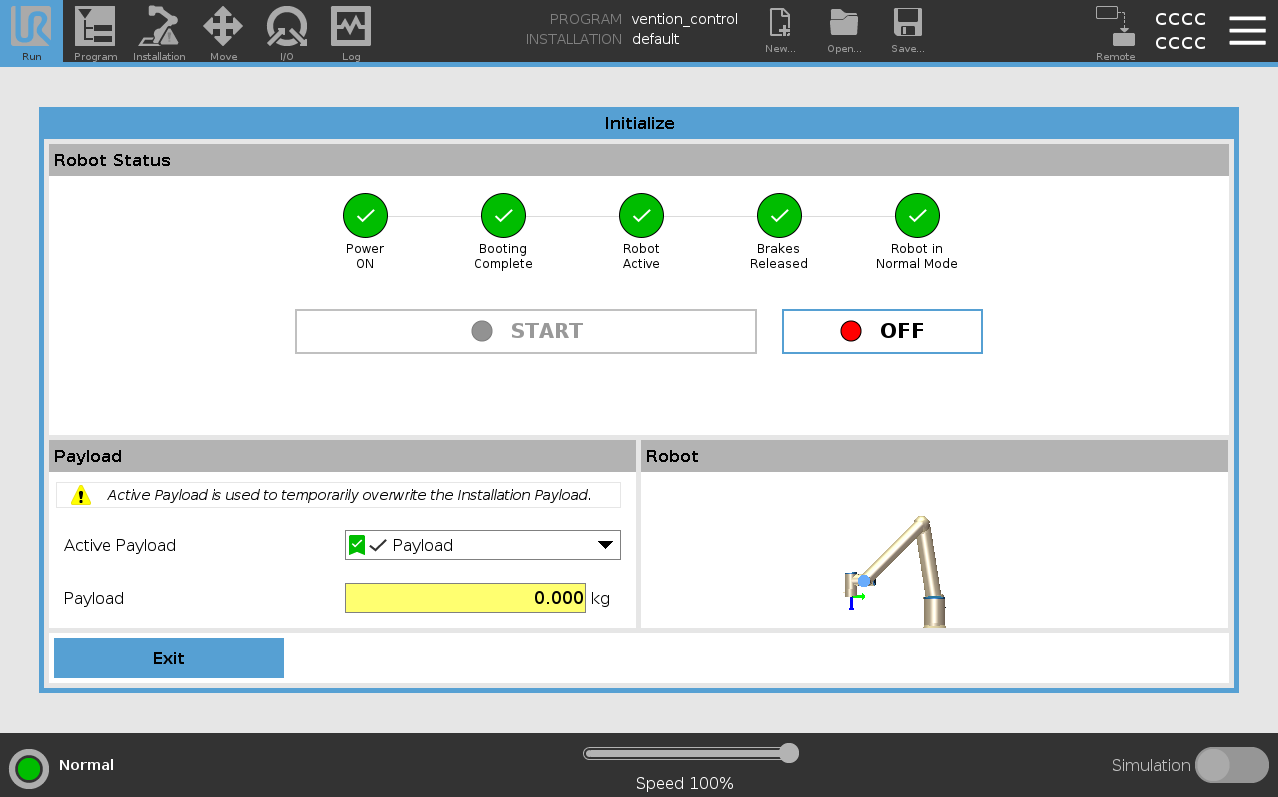
4.7 Power On the Robot
Tap on the red pill displaying Power off
Tap On
Tap Start
The robot should now be energized and ready to be controlled
5. Connecting to the Robot Controller from MachineMotion
You're now ready to deploy your MachineLogic application from your Vention project to the MachineMotion AI controller!
Follow the steps detailed in the Deploy your Application and Configuration to Controller documentation.
6. Troubleshooting
If the robot connection fails, there could be a few reasons that are the root cause:
Issue | Potential Cause | Solution |
|---|---|---|
Robot not responding | Controller is in Local mode | Switch to Remote Control (Section 4.6) |
IP conflict | IP address mismatch | Re-check network (3.1) and URCap settings (4.2) |
Safety error | Module not wired correctly | Revisit wiring setup (Section 2.1) |