|
Overview
Vention cloud-based MachineBuilder offers an intuitive 3D environment to quickly assemble industrial equipment. Unlike a traditional CAD, Vention’s approach to “assembly constraints” does not rely on connections between faces and edges of selected parts. Instead, Vention’s assembly constraints are based on “automatic connection,” with each connector defining all degrees of freedom of a given part. In most cases, this means that each new part can be added and constrained to an assembly in a single mouse click. This means that a user who masters the guide below can design industrial equipment in literally minutes, instead of hours or days.
In this how-to guide, we will cover basic, as well as more advanced, part insertion and connection functionalities of the Vention MachineBuilder platform.
Inserting and connecting parts
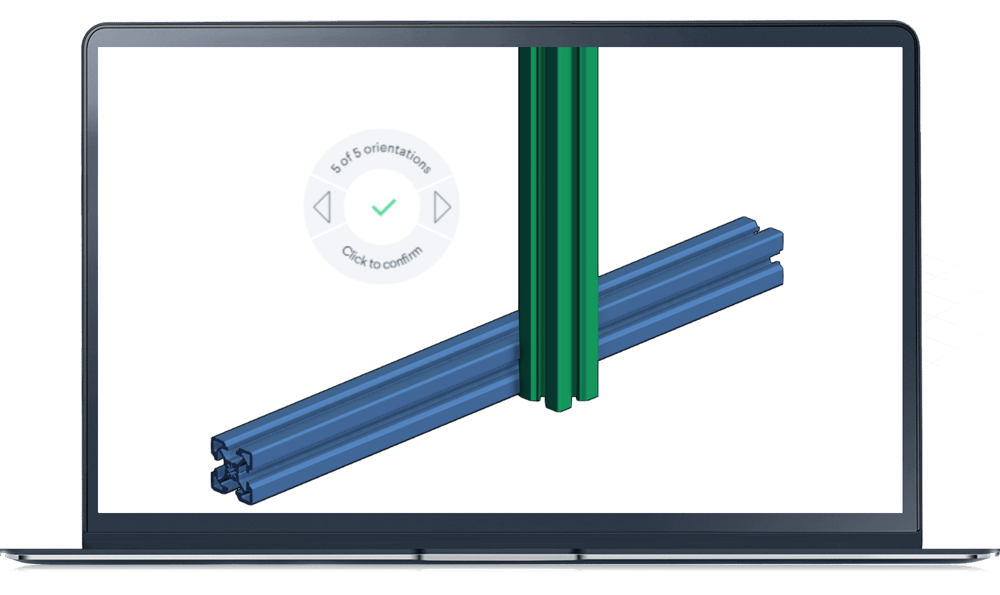
Unlike traditional CAD software, Vention’s cloud-based MachineBuilder does not require users to insert parts into the 3D workspace before they can be constrained to other parts of an assembly. Those two operations (i.e., part insertion and part connection) are done in the same single step.
To insert a part, select one from the “Parts Library” on the left by clicking on it once. From here, drag your cursor over to the design space. The part will follow the cursor and will remain transparent until its position is confirmed. Prior to this, you can change the orientation of the part by using the left and right arrow keys on your keyboard. Once the part is in the desired orientation, left click or press “Enter” on your keyboard to confirm its placement. At this point the part will become opaque.