Overview
Welcome to the MachineMotion AI integration guide for Universal Robots! This guide walks you through the setup process to connect and control your UR Robot!
Compatibility
⚠️ MachineMotion v2
⚠️MachineMotion AI - Breaking Change
Starting from version 3.3.0, a breaking change has been introduced and the configuration procedure for system version of 3.2.0 and bellow must follow this specific procedure.
🛑 PolyScope X IncompatibilityUniversal Robot PolyScope X is currently incompatible with the current version of your MachineMotion AI.
Compatibility is planned later in 2026 and only PolyScope 5 is compatible as of now.
1. System Requirements
To program a UR Robot with MachineMotion AI, ensure you have the following components:
✅ MachineMotion AI Controller - Software Version v3.3.0 or higher
✅ Vention Pendant
✅ Robot Safety Module
✅ E-Stop Module with Reset
✅ UR Robot with controller
✅ Safety Extension Cables
Note: This list depicts the minimum set of components needed to configure and control your UR robot with MachineMotion AI.
Your system may have a different set of components according to your safety needs.
2. Hardware Connection
Connect the Robot Safety Module to the MachineMotion AI controller, pendant, and robot controller (As shown in Figure 1).
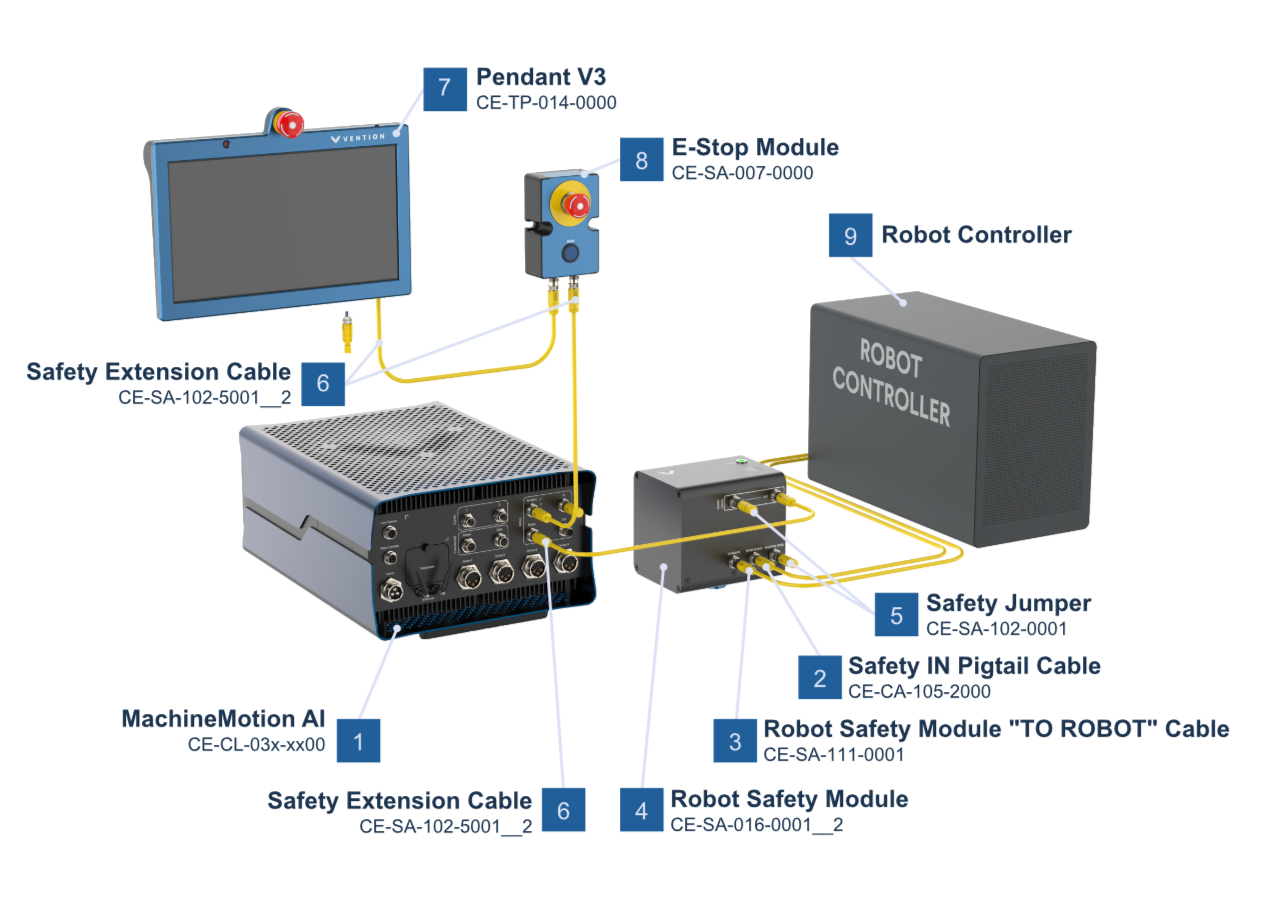
Figure 1: Connection Diagram for MachineMotion AI with Robot Safety Module
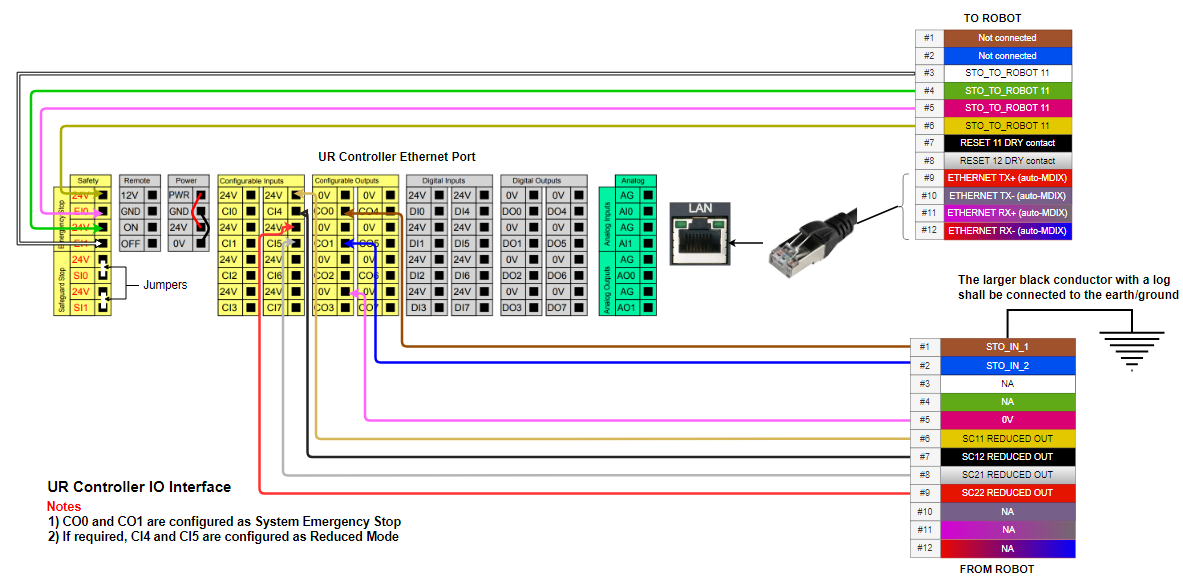
Ensure all safety devices are wired properly and the controller safety wiring is done as per following diagram
Power on all devices.
3. Robot Controller Configuration
3.1 Configure Passwords
On a new UR robot, passwords needs to be defined for each of Admin, Mode and Safety.
On the UR Teach Pendant, Navigate to Menu → Settings → Password
Define a password for all three type of password (Admin, Mode & Safety)
.png)
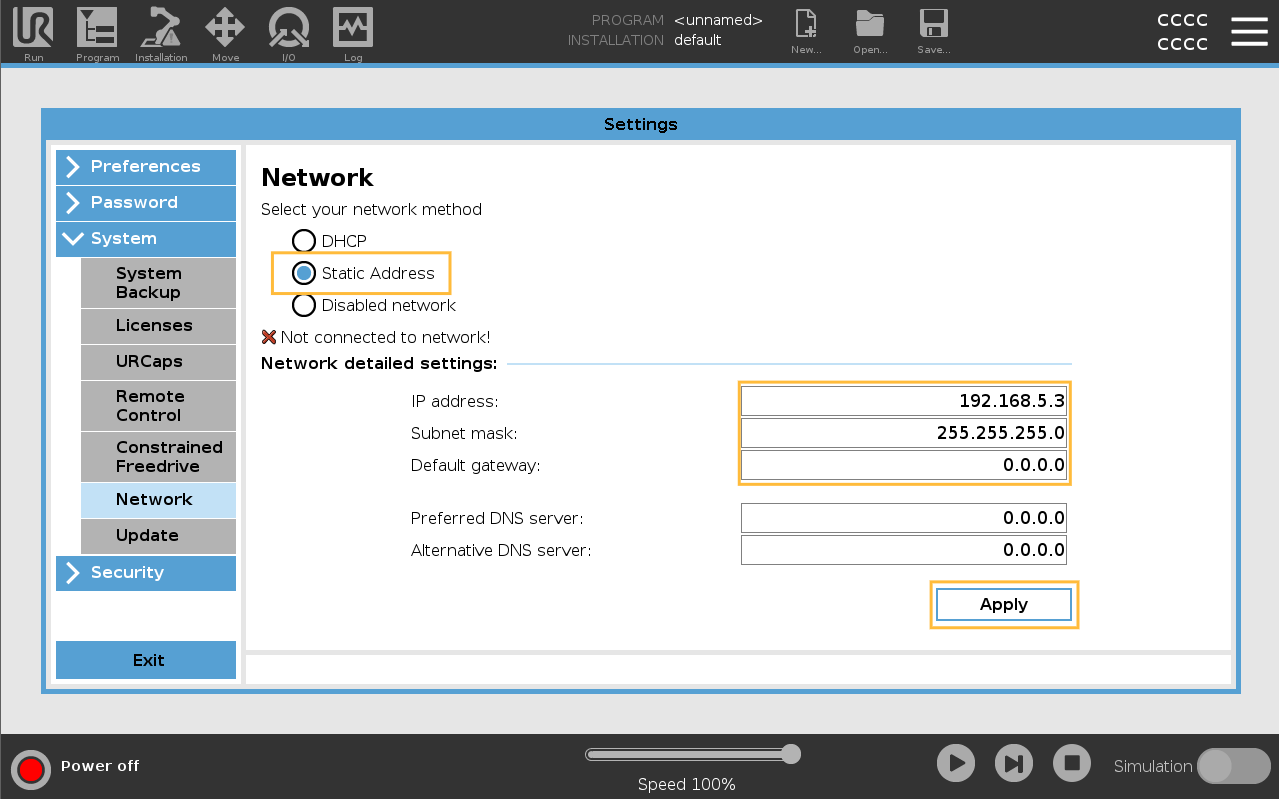
3.2 Set Static IP Address
On the UR Teach Pendant:
Go to:
Menu > Settings > System > NetworkUnlock the page by entering your Admin password
Set to Static Address
Use the following values:
IP Address:
192.168.5.3Subnet Mask:
255.255.255.0Default Gateway:
0.0.0.0DNS Servers:
0.0.0.0
Click Apply.
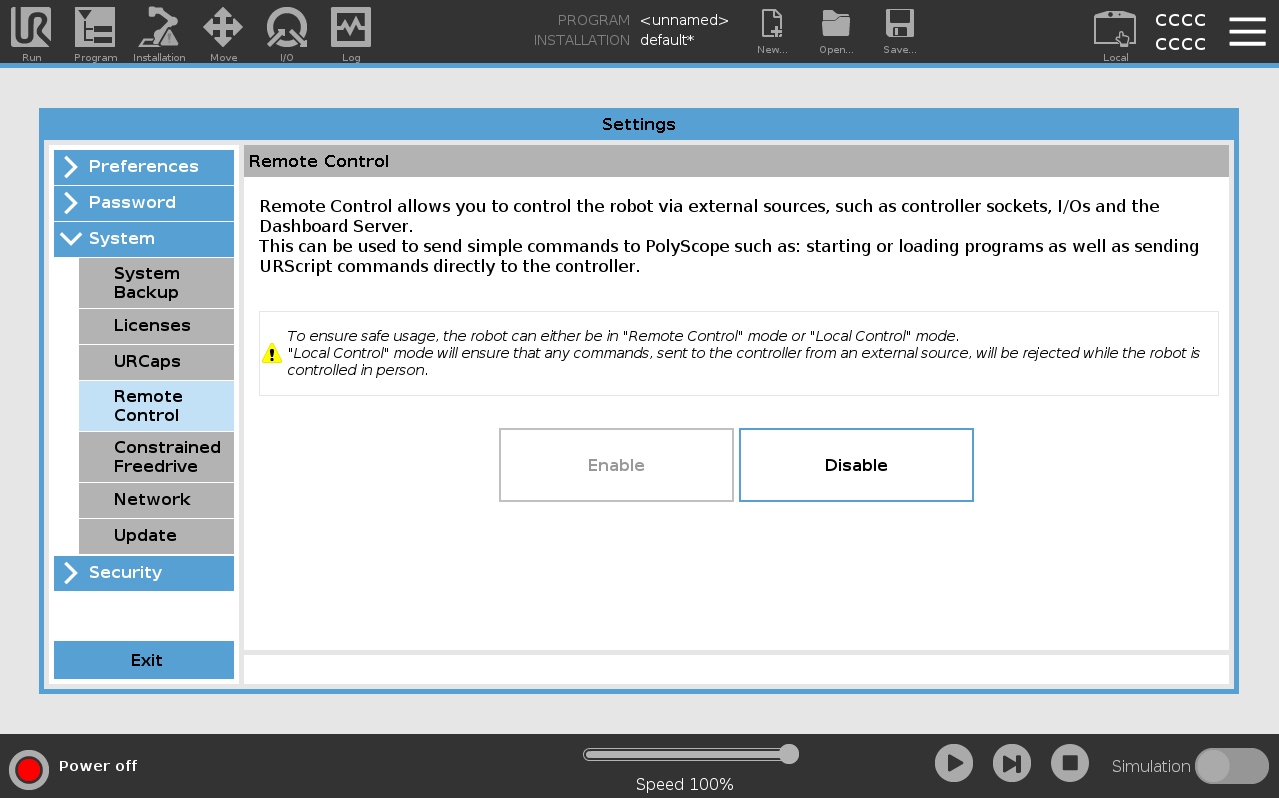
3.3 Enable Remote Control
Navigate to:
Menu > Settings > System > Remote ControlUnlock the page by entering your Admin password
Click Enable
3.4 Configure Communication Interfaces
Navigate to:
Menu > Settings > Security > ServicesUnlock the page by entering your Admin password
Validate that the following interfaces are enabled and enable them if they are not:
Dashboard Server
Primary Client Interface
Real-Time Data Exchange (RTDE)
You can now exit the Settings menu.
3.5 Robot Controller Safety Configuration
The input & output pins on the Universal Robots controller can be configured as safety pins using the UR Teach Pendant.
Navigate to:
Installation > Safety > I/OUnlock the page by entering your Safety password (Defined previously)
(If needed) Assign to config_in[0], config_in[1] : Reduced Mode
Assign to config_out[0], config_out[1] : System Emergency Stopped
.png)
Universal Robot Safety I/O Configuration
3.6 Ensure Installation File is Valid
Navigate to:
Installation > General > PayloadSet the Payload Mass to 0.001kg
.png)
Navigate to:
Installation > Safety > Tool PositionUnlock the page by entering your Safety password
Click on Add Tool in the right pane, then on Apply
When prompted, click on Apply and restart
.png)
3.7 Safety Joint Limits
Safety Joint Speed Limits
Joint speed limits cannot be lowered on the controller from default values. This will lead to inconsistency between configured joints speed on the MachineMotion AI and robot controller.
Navigate to:
Installation > Safety > Joint LimitsValidate that the maximum speed per joints in Normal Mode are the same as shown in the picture bellow.
.png)
If the values are lower than shown in the picture:
Unlock the page by entering your Safety password (Defined previously)
Change the joint speed limits as per recommendation
Click on Apply
When prompted, click on Apply and restart
3.8 Save Installation File
Once all the installation configuration changes are completed, we need to save it.
From the top navigation bar, click on Save…
Click on Save Installation As…
Select the default.installation file from the file explorer, then click on Save
3.9 Switch to Remote Control Mode
On the top bar, switch from Local to Remote Control
.png)
3.10 Power On the Robot
Tap on the red pill displaying Power off
Tap On
Tap Start
The robot should now be energized and ready to be controlled
.png)
4. Connecting to the Robot Controller from MachineMotion
You're now ready to deploy your MachineLogic application from your Vention project to the MachineMotion AI controller!
Follow the steps detailed in the Deploy your Application and Configuration to Controller documentation.
5. Support
If you need further assistance, reach out to our support team:
📧 integrationsupport@vention.cc
📞 +1-800-940-3617 (ext. 2)
6. Troubleshooting
6.1 Robot connection troubleshooting
If the robot connection fails, there could be a few reasons that are the root cause:
Issue | Potential Cause | Solution |
|---|---|---|
Robot not responding | Controller is in Local mode | Switch to Remote Control (Section 3.7) |
IP conflict | IP address mismatch | Re-check network (3.2) |
Safety error | Module not wired correctly | Revisit wiring setup (Section 2) |
6.2 Retrieving logs
You can retrieve the robot’s logs directly from the MachineMotion, with the MachineMotion software releases v3.2.0 or newer. The MachineMotion will assume that the IP address of the robot is 192.168.5.3 and that the password was unchanged.
To enable this feature, you need to ensure that ssh capabilities are enabled on your robot controller, under Settings > Security > Secure Shell
Also ensure that you are not restricting the MachineMotion’s IP address in the robot controller’s inbound connections.
Under Settings > Security > General:
“Restrict inbound network access to this subnet” should be left empty, or not exclude the MachineMotion’s IP address
“Disable inbound access to additional interfaces“ should be left empty, or not include the port used for ssh (usually port 22)
.png)